 RabbitMQ Integration Guide
Use MaestroHub's RabbitMQ connector to exchange messages with enterprise applications, microservices, and IoT backends through AMQP 0-9-1. This guide explains how to configure connections, design publish/consume functions, and orchestrate pipelines.
Overview
The RabbitMQ connector delivers:
- AMQP 0-9-1 protocol support with advanced exchange routing (direct, topic, fanout, headers)
- Publish and consume functions for bidirectional messaging
- Message persistence and acknowledgments for reliable delivery
- TLS/SSL encryption (AMQPS) for secure connections
- Virtual host isolation for multi-tenant environments
- Competing consumers for automatic load balancing across pipeline instances
- Payload templating with dynamic
((parameter))syntax
Connection Configuration
Creating a RabbitMQ Connection
Navigate to Connections → New Connection → RabbitMQ and fill in these details:
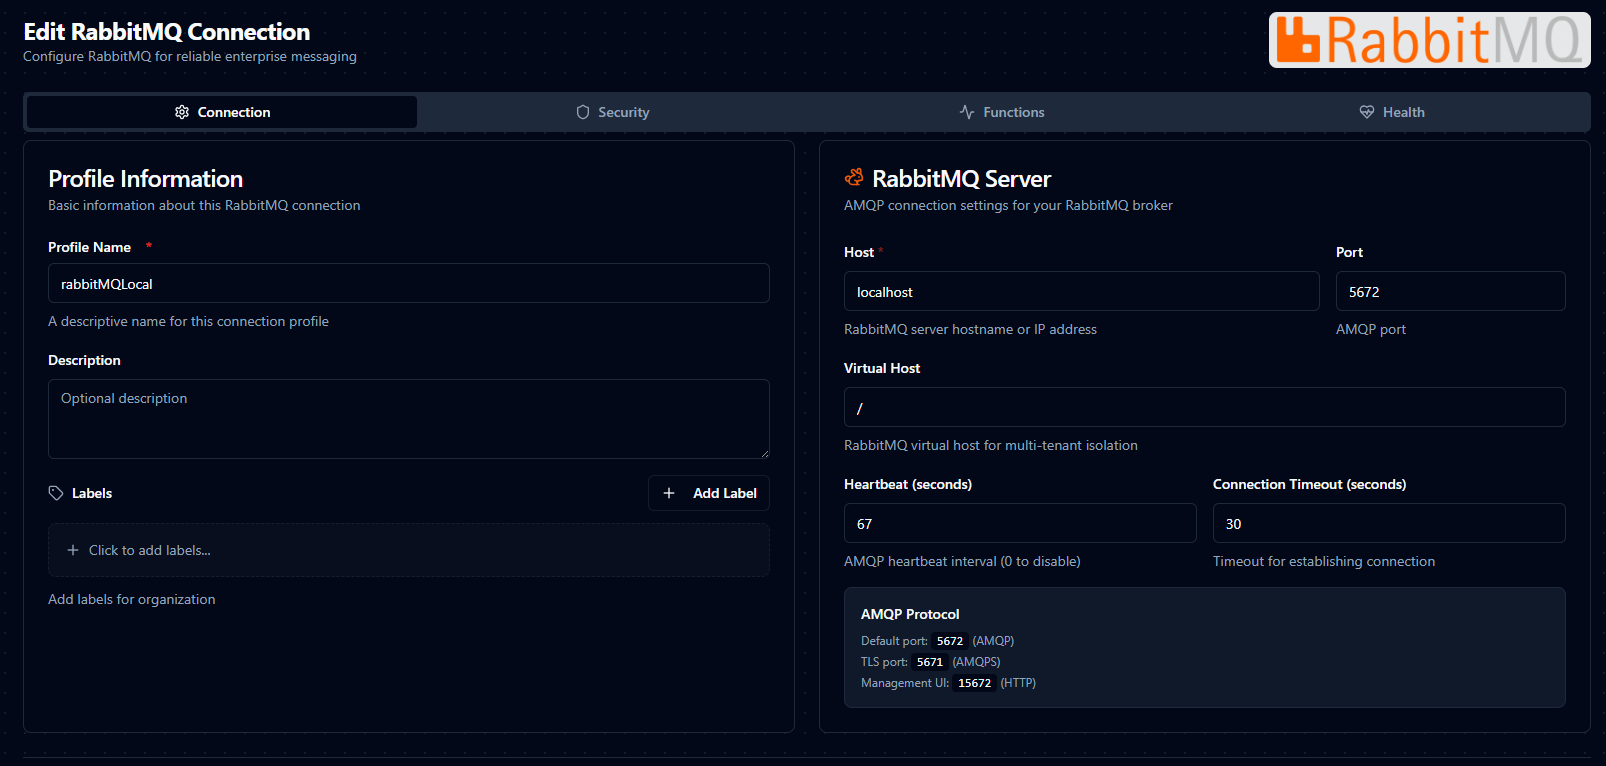
Configure a new RabbitMQ connection with broker details and authentication
RabbitMQ Connection Creation Fields
1. Profile Information
| Field | Default | Description |
|---|---|---|
| Profile Name | - | A descriptive name for this connection profile (required, max 100 characters) |
| Description | - | Optional description for this RabbitMQ connection |
2. Broker Configuration
| Field | Type | Default | Required | Validation | Description |
|---|---|---|---|---|---|
| Host | String | localhost | Yes | Non-empty | RabbitMQ server hostname or IP address |
| Port | Number | 5672 | Yes | 1–65535 | AMQP port (5672 for AMQP, 5671 for AMQPS) |
| Virtual Host | String | / | No | - | RabbitMQ virtual host for multi-tenant isolation |
Port Defaults
5672: Standard AMQP (unencrypted)5671: AMQPS (TLS-encrypted)
3. Authentication
| Field | Type | Default | Required | Description |
|---|---|---|---|---|
| Username | String | - | No | Username for RabbitMQ authentication |
| Password | Password | - | No | Password for RabbitMQ authentication (stored encrypted) |
4. Advanced Settings
| Field | Type | Default | Required | Validation | Description |
|---|---|---|---|---|---|
| Heartbeat (seconds) | Number | 60 | No | 0–3600 | AMQP heartbeat interval for detecting dead connections. 0 uses the broker's interval; a client cannot disable heartbeats on its own. |
| Connection Timeout (seconds) | Number | 30 | No | 1–300 | Maximum time to wait for a connection to be established |
5. TLS/SSL Settings
| Field | Type | Default | Description |
|---|---|---|---|
| Enable TLS | Boolean | false | Use TLS/SSL for secure connection (AMQPS) |
| Skip Certificate Verification | Boolean | false | Skip TLS certificate verification (not recommended for production) |
| Server Name (SNI) | Text | - | Server name for SNI and certificate verification. Defaults to the host |
| CA Certificate | PEM | - | CA certificate used to verify the broker's server certificate. Leave empty to verify against the system trust store. Use this for a broker with a private-CA certificate instead of skipping verification |
| Client Certificate | PEM | - | Client certificate for mutual TLS (stored as a secret) |
| Private Key | PEM | - | Client private key for mutual TLS (stored as a secret). Must be provided together with the client certificate |
The fields below Enable TLS are only displayed when Enable TLS is on.
6. Connection Labels
| Field | Default | Description |
|---|---|---|
| Labels | - | Key-value pairs to categorize and organize this RabbitMQ connection (max 10 labels) |
Example Labels
environment: production– Deployment environmentteam: backend– Responsible teamregion: us-east-1– Geographical region
- The default virtual host
/is used by most RabbitMQ installations. Change this only if your broker is configured with custom virtual hosts. A leading/is optional:/stagingandstagingboth open thestagingvhost. - A heartbeat of 0 uses the broker's interval; the client and broker agree on the lower non-zero value, so a client cannot disable heartbeats on its own. A value of 60 seconds is recommended for most deployments.
- When TLS is enabled, update the port to
5671(the standard AMQPS port). - The password field is stored encrypted and displayed as masked after saving.
Function Builder
Creating RabbitMQ Functions
After the connection is configured:
- Open the connection and go to its Functions tab → New Function
- Choose Publish or Consume as the function type
- Configure exchange, routing key, payload, or queue settings
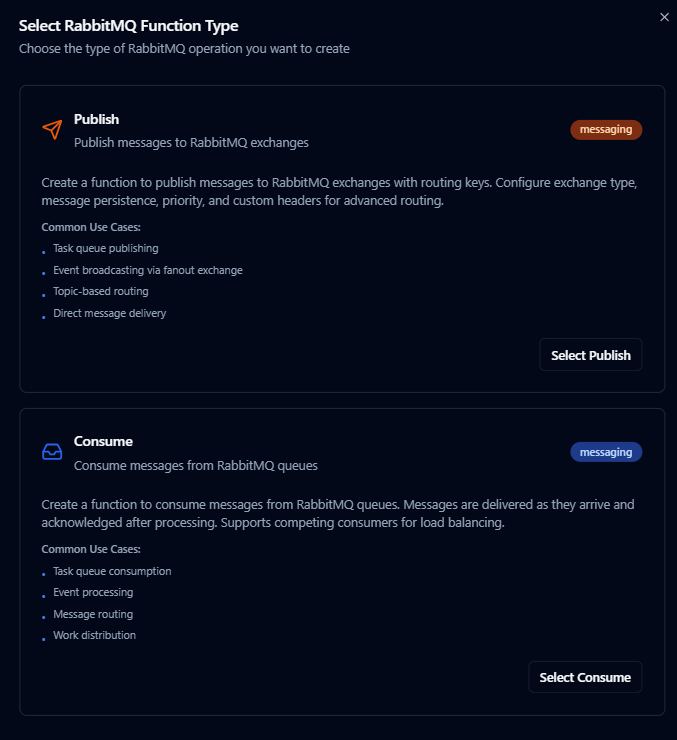
Design RabbitMQ publish or consume functions with exchange routing and payload templates
Publish Function
Purpose: Send messages to RabbitMQ exchanges with configurable routing keys, persistence, and custom headers.
Configuration Fields
| Field | Type | Required | Default | Description |
|---|---|---|---|---|
| Exchange | String | Yes | - | Exchange to publish to. Use an empty string for the default exchange (routes directly to a queue by routing key). Supports ((parameter)) syntax. |
| Routing Key | String | No | "" | Routing key for exchange binding. When using the default exchange, this is the queue name. Optional for fanout exchanges. Max 255 characters. Supports ((parameter)) syntax. |
| Payload | String | Yes | - | Message payload to publish. Supports ((parameter)) syntax for dynamic content. |
| Content Type | String | No | application/json | MIME type of the message payload (application/json, text/plain, application/xml, application/octet-stream) |
| Persistent | Boolean | No | true | Whether the message should survive broker restart (delivery mode 2) |
| Publisher Confirms | Boolean | No | true | Wait for the broker to accept the message before reporting success. Leave this on: with it off, the publish reports success as soon as the message is written to the socket, so a message the broker rejects — publishing to an exchange that does not exist, for example — is discarded without an error. |
| Mandatory | Boolean | No | false | Fail the publish if no queue is bound to the exchange with a matching routing key, instead of letting the broker discard the message. Requires Publisher Confirms. |
| Priority | Number | No | 0 | Message priority (0–9) for priority queues |
| Expiration (ms) | String | No | - | Per-message TTL in milliseconds |
| Headers (JSON) | Object | No | - | Custom headers as a JSON object for headers exchange routing or message metadata. Supports ((parameter)) syntax. |
| Correlation ID | String | No | - | Correlation identifier for request/response patterns |
| Reply To | String | No | - | Reply-to queue name for RPC patterns |
Use Cases: Task queue publishing, event broadcasting via fanout exchange, topic-based routing, direct message delivery
Consume Function
Purpose: Receive messages from RabbitMQ queues. Messages are delivered as they arrive and acknowledged after processing. Supports competing consumers for load balancing.
Configuration Fields
| Field | Type | Required | Default | Validation | Description |
|---|---|---|---|---|---|
| Queue | String | Yes | - | 1–255 characters | Queue name to consume messages from |
| Auto Acknowledge | Boolean | No | false | - | Automatically acknowledge messages upon delivery. Disable for manual ack (safer for reliability). |
| Exclusive | Boolean | No | false | - | Only this consumer can access the queue |
| Prefetch Count | Number | No | 1 | 0–65535 | Number of unacknowledged messages to prefetch (controls throughput vs. memory trade-off) |
| Consumer Tag | String | No | - | - | Unique consumer identifier (auto-generated if empty) |
Use Cases: Task queue consumption, event processing, message routing, work distribution
Using Parameters
RabbitMQ publish functions support parameterized values via the ((parameterName)) syntax. Use parameters in the exchange, routing key, payload, headers, correlation ID, and reply-to fields.
| Configuration | Description | Example |
|---|---|---|
| Type | Validate incoming pipeline data | string, number, boolean, datetime, json, buffer |
| Required | Force parameter presence | Required / Optional |
| Default Value | Provide fallback values | 'line-01', 0, '{}' |
| Description | Document intent for other authors | "Routing key suffix for topic exchange" |
Pipeline Integration
Use the RabbitMQ connection functions you create here as nodes inside the Pipeline Designer to synchronize production data with the rest of your stack. Drag in the publish node, bind its parameters to upstream node outputs or constants, and shape event-driven flows without leaving the designer.
If you are planning more complex orchestration, review the Connector Nodes page for patterns on where RabbitMQ nodes fit best within broader orchestration strategies.
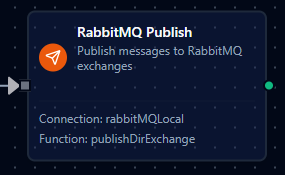
RabbitMQ publish node with connection, function, and parameter mappings
Common Use Cases
Task Queue Distribution
Publish work items to RabbitMQ queues consumed by worker processes. Competing consumers automatically distribute work across multiple pipeline instances.
Event Broadcasting
Use fanout exchanges to broadcast events (e.g., order placed, sensor alert) to all bound queues without specifying routing keys.
Topic-Based Routing
Route messages to specific queues using topic exchanges and routing key patterns (e.g., sensor.temperature.high, order.*.completed).
Enterprise Application Integration
Bridge data between legacy systems and modern services by publishing structured messages to RabbitMQ exchanges and consuming from dedicated queues.
RPC Request/Response
Implement request/response patterns using the Correlation ID and Reply To fields. Publish a request with a unique correlation ID and listen on the reply-to queue for the response.