Groups
A group is a set of users (and other groups) in one workspace. Any role you assign to a group applies to every member: add someone to the group and they get the group's roles; remove them and they lose those roles. Groups are the way to grant roles to many people without assigning each role user by user.
Open Admin → Identity & Access → Users & Roles and select the Groups tab.
Groups need the Advanced Access Control (advanced_access_control) license feature. Without it, the Groups tab shows an upgrade card instead of the list. After a downgrade, existing groups keep working: their members keep the group's roles, and you can still remove members and delete groups. You cannot create groups, edit them, add members or assign roles to them until the feature is back.
Who can manage groups
| Action | Permission | Built-in roles that have it |
|---|---|---|
| See the Groups tab and open a group | group:read | Identity Administrator, Security Administrator, System Administrator |
| Create a group | group:create | same |
| Edit a group's description | group:update | same |
| Delete a group | group:delete | same |
| Add a member | group:assign | same |
| Remove a member | group:revoke | same |
| Assign or remove a group's roles | role:assign / role:revoke | Workspace Administrator, Identity Administrator, Security Administrator, System Administrator |
Workspace Administrator does not manage groups. It has no group:* permissions, so it doesn't see the Groups tab. Give a Workspace Administrator the Identity Administrator role as well if they need to manage groups.
Groups list
The list shows each group's name, description and member count. Use the search box to filter by name or description. Click a group's name to open its page. The ⋮ menu on a row has Edit and Delete.
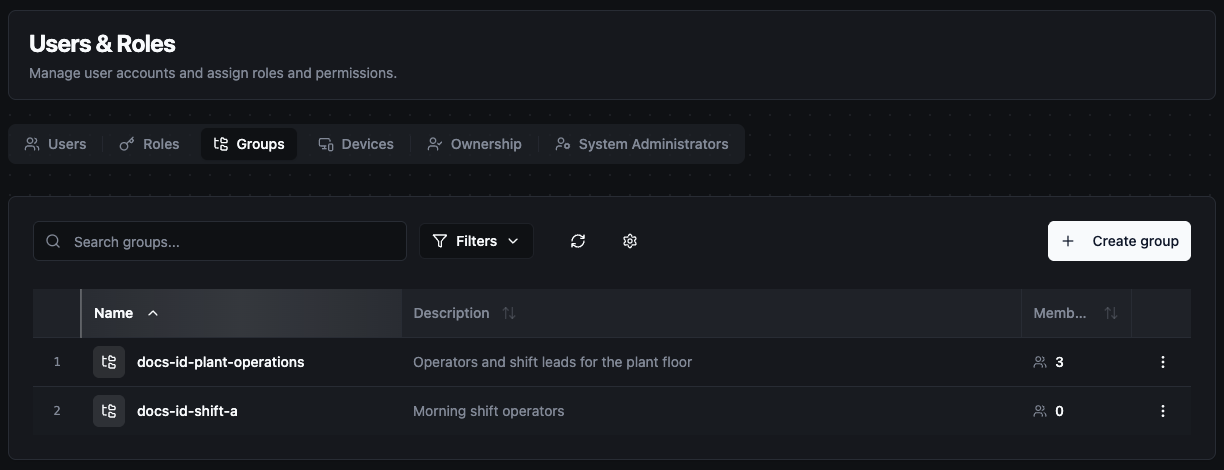
The Groups tab
Create a group
- On the Groups tab, click Create group.
- Enter a Name and, optionally, a Description.
- Click Create.
Name rules:
- 2 to 128 characters: letters, digits, dots (
.), underscores (_) and hyphens (-). It must start with a letter. Spaces are not allowed. - It can't start with
system,internal,root,admin.oradmins(in any capitalization). - It must be unique within the workspace. Two workspaces can each have a group with the same name.
The name can't be changed later. Edit only changes the description. To rename a group, create a new one, move the members and roles across, and delete the old one.
The group page
The group page shows the name, description, member count and creation date, with Edit and Delete buttons. It has three tabs.
Members
Use Add member at the top:
- Choose User or Group as the member type.
- For a user, search by name or email and pick the user. For a group, pick it from the list. People and groups that are already members are not listed.
- Optionally set Expires at. When the date passes, the member stops getting the group's roles. Leave it empty for a permanent membership.
- Click Add.
The members table shows each member's name, type (user or group) and expiry (Permanent, or how long until it expires). Click the bin icon on a row to remove a member. The member loses the group's roles immediately.
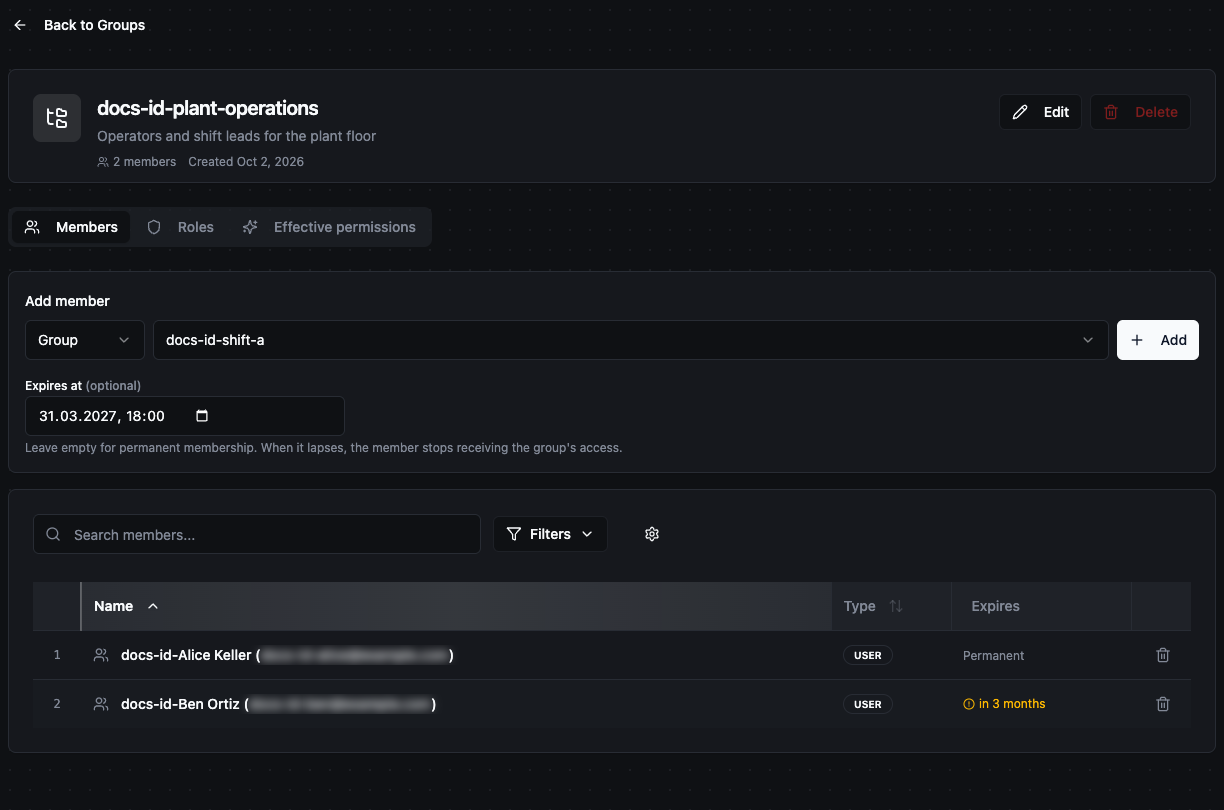
Adding a nested group with an expiry date on the Members tab
Rules MaestroHub enforces when you add a member:
- You can't hand out more than you hold. A new member gets every role the group has. If the group has a role whose permissions you don't hold yourself, adding a member is refused.
- Nested groups must be in the same workspace. A group can't contain itself, nesting can't form a loop (A in B in A), and a chain can be at most 10 groups deep.
- Expiry must be at least 5 minutes and at most 365 days in the future.
A user who is added to or removed from a group by someone else gets a notification.
The user picker loads only the 100 most recently created users. On a larger installation, an older user can't be found in the picker, and an older member may be shown by ID instead of by name.
Roles
The Roles tab lists the roles assigned to the group, with the date each was assigned. Every member of the group gets all of them.
- To assign a role, pick it under Add role and click +.
- To remove a role, click × on its row. Every member loses it, unless they also have the role another way (assigned directly, or through another group).
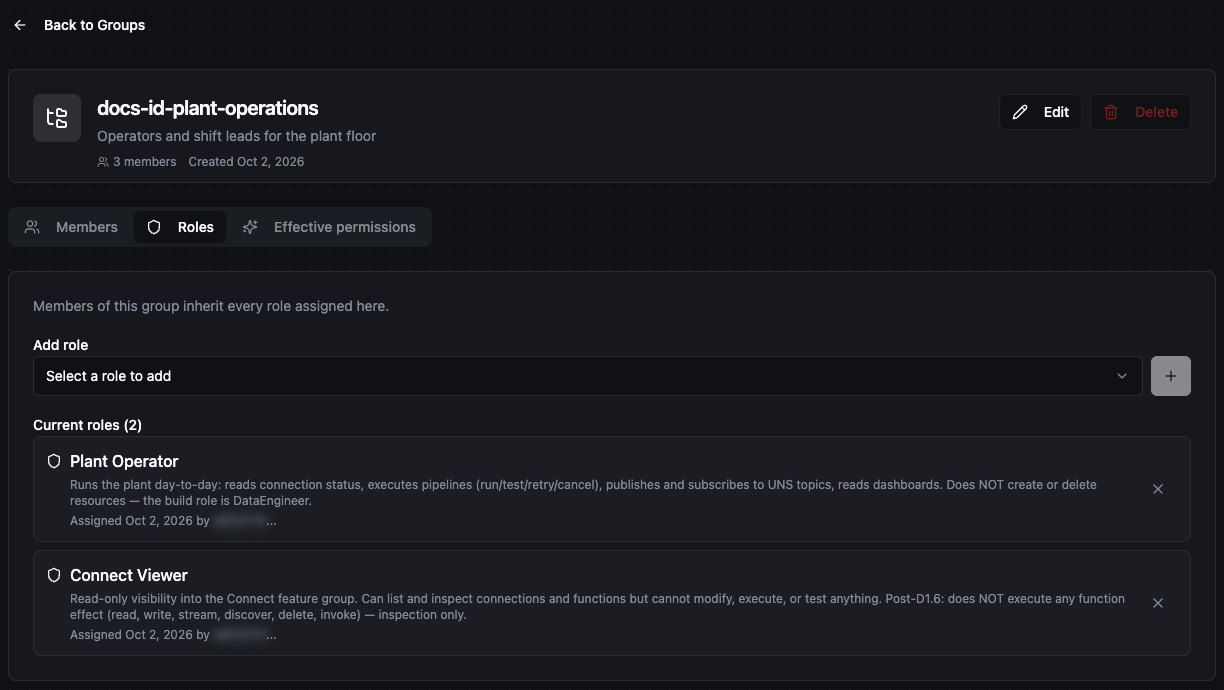
The Roles tab: every member of the group gets these roles
Only workspace-level roles can be assigned to a group. System Administrator and the Fleet roles are not offered, because they are granted at platform or fleet level and a group belongs to one workspace. To make someone a platform administrator, see System Administrators.
As with members, you can only assign a role whose permissions you hold yourself.
Effective permissions
Effective permissions shows everything a member gets through this group, grouped by feature area. Use it to check what a group really grants before you add people to it.
Nested groups
When group B is a member of group A, everyone in B gets the roles of A as well as the roles of B. Use nesting to build larger teams from smaller ones, for example a "Plant-Operations" group that contains the "Shift-A" and "Shift-B" groups.
Delete a group
Click Delete on the group page or in the row's ⋮ menu.
- Empty group: confirm, and the group is deleted.
- Group with members (or a group that is itself a member of another group): MaestroHub asks again: Remove all members and delete. Confirming removes every membership and deletes the group. Members lose the roles they had only through this group. Roles and access they have another way are not affected.
- Group that owns resources: deletion is refused, even with the second confirmation. Transfer the resources to another owner first. See Ownership.
Deleting a group also removes every role and share that was granted to the group. Deletion cannot be undone.
Groups and single sign-on
Single sign-on does not add users to MaestroHub groups. The groups your identity provider sends (OIDC claims, SAML attributes, LDAP memberOf) are mapped directly to roles, not to MaestroHub groups. There is no automatic synchronization of identity-provider groups into the Groups tab: you add members by hand.
If you want everyone in an identity-provider group to have a set of roles, map that group to the roles in the provider's role mapping. See Role Mapping.
Good to know
- Groups belong to one workspace. A user who works in several workspaces needs to be added to a group in each.
- A group can own resources and receive shares, like a user. A team as the owner of a resource survives people leaving. If a group that owns resources loses its last member, those resources appear on the Ownership tab as owned by an empty group.
- A group can be the workspace's designated fallback owner.