Pipelines
Build workflows from nodes in the Pipeline Designer, run them on a trigger, a schedule or by hand, and review each run in Execution History.
- Where
- Orchestrate › Pipelines
- Run timeout
- 30 minutes by default, from 1s up to 24h
- Name
- 3 to 100 characters, unique
Overview
A Pipeline in MaestroHub is a visual workflow that automates data processing and business logic. Pipelines combine nodes (building blocks) to create sophisticated automation without writing code. Each pipeline can be triggered manually or on a schedule, and includes built-in execution monitoring and debugging capabilities.
Navigation Path: Orchestrate > Pipelines
Creating a Pipeline
Click + New Pipeline to open the creation dialog. The dialog has two tabs: Basic Settings and Advanced Settings.
Basic Settings
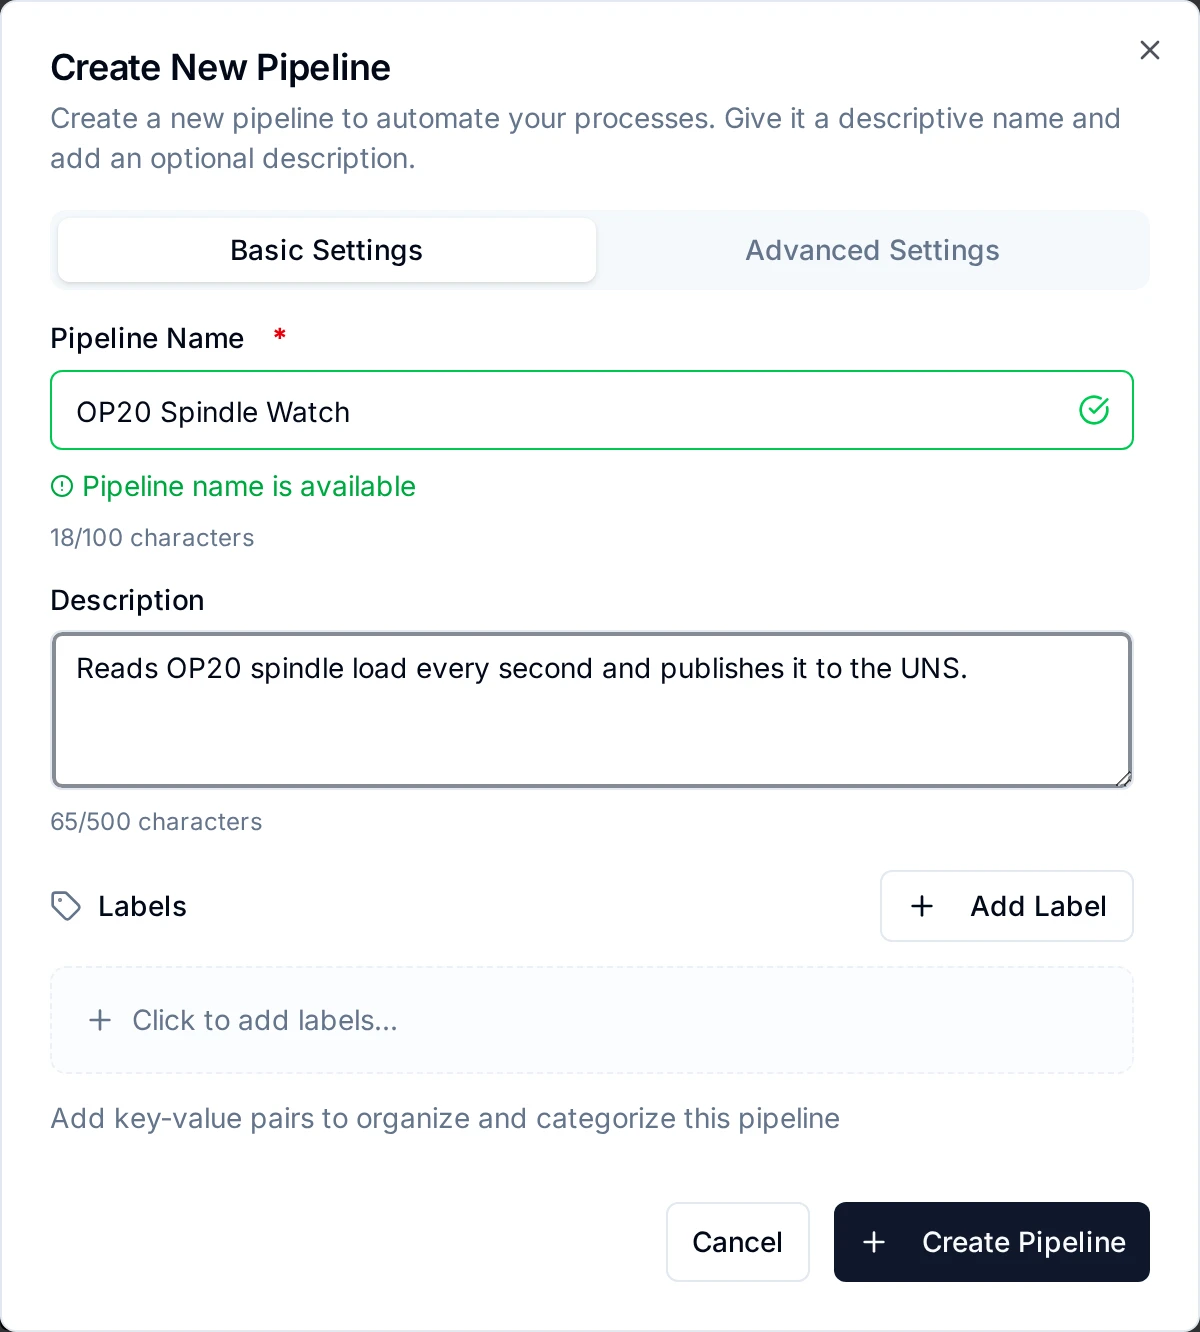
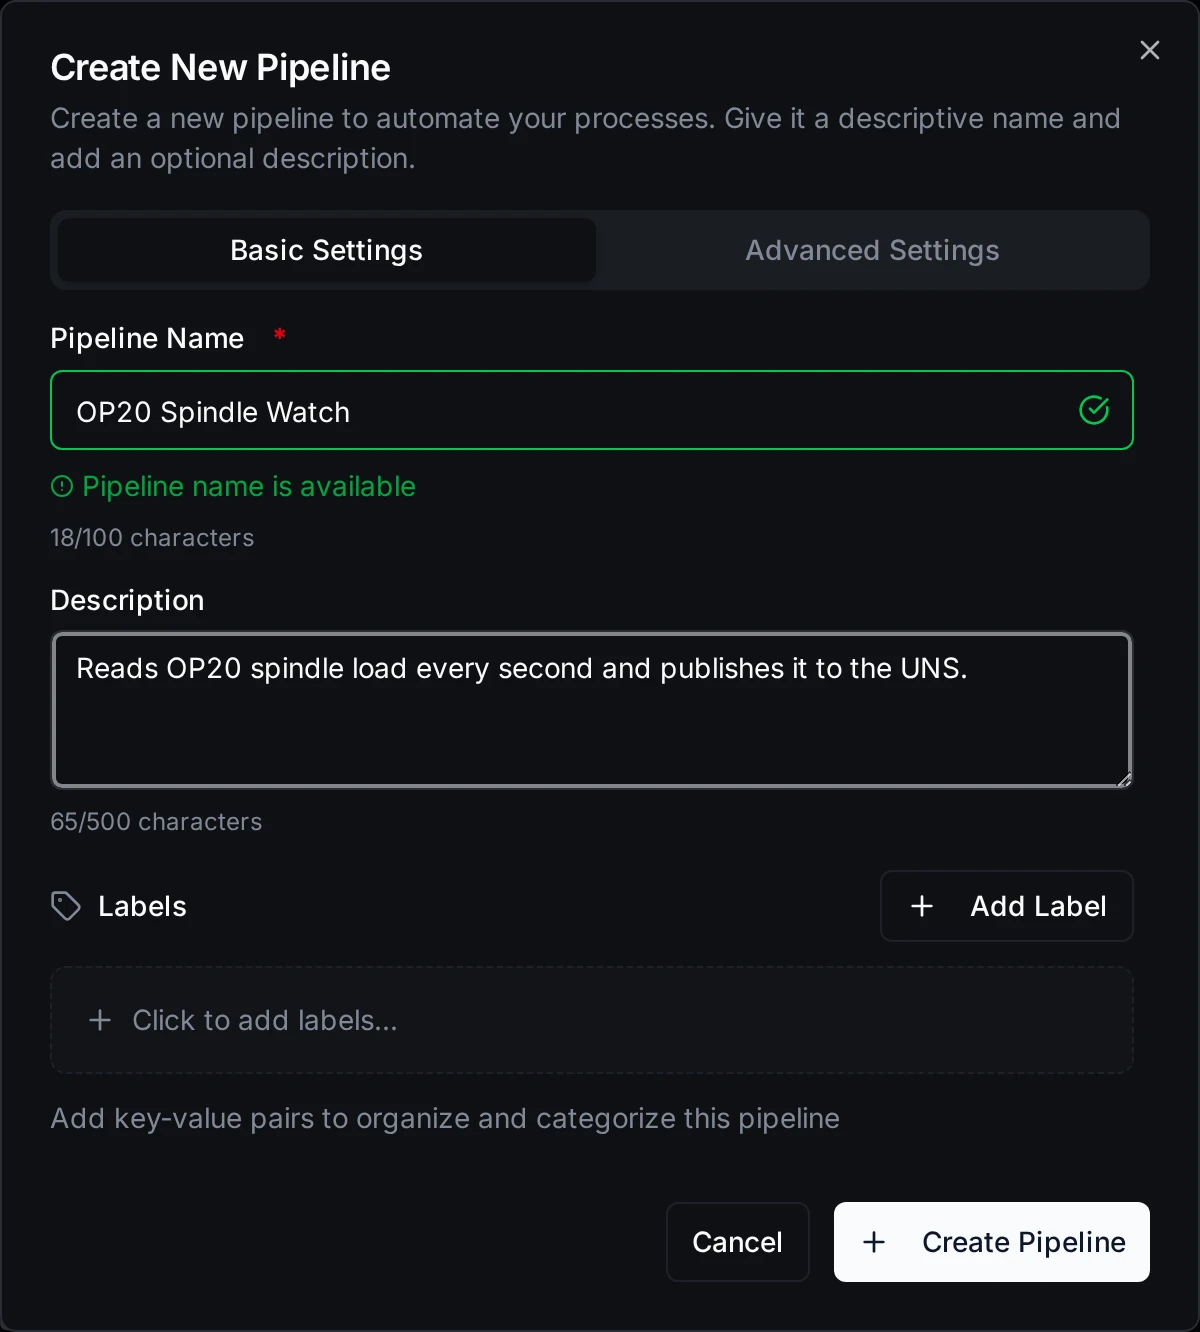
Basic Settings: pipeline name, description, and labels.
| Field | Required | Description |
|---|---|---|
| Pipeline Name | Yes | Unique name for your pipeline (3-100 characters). The system validates uniqueness in real time and suggests alternatives if the name is already taken. |
| Description | No | Describe what this pipeline does (max 500 characters). |
| Labels | No | Key-value pairs to organize and categorize the pipeline (e.g., environment:production, team:data-engineering, owner:mike.jones). |
Advanced Settings
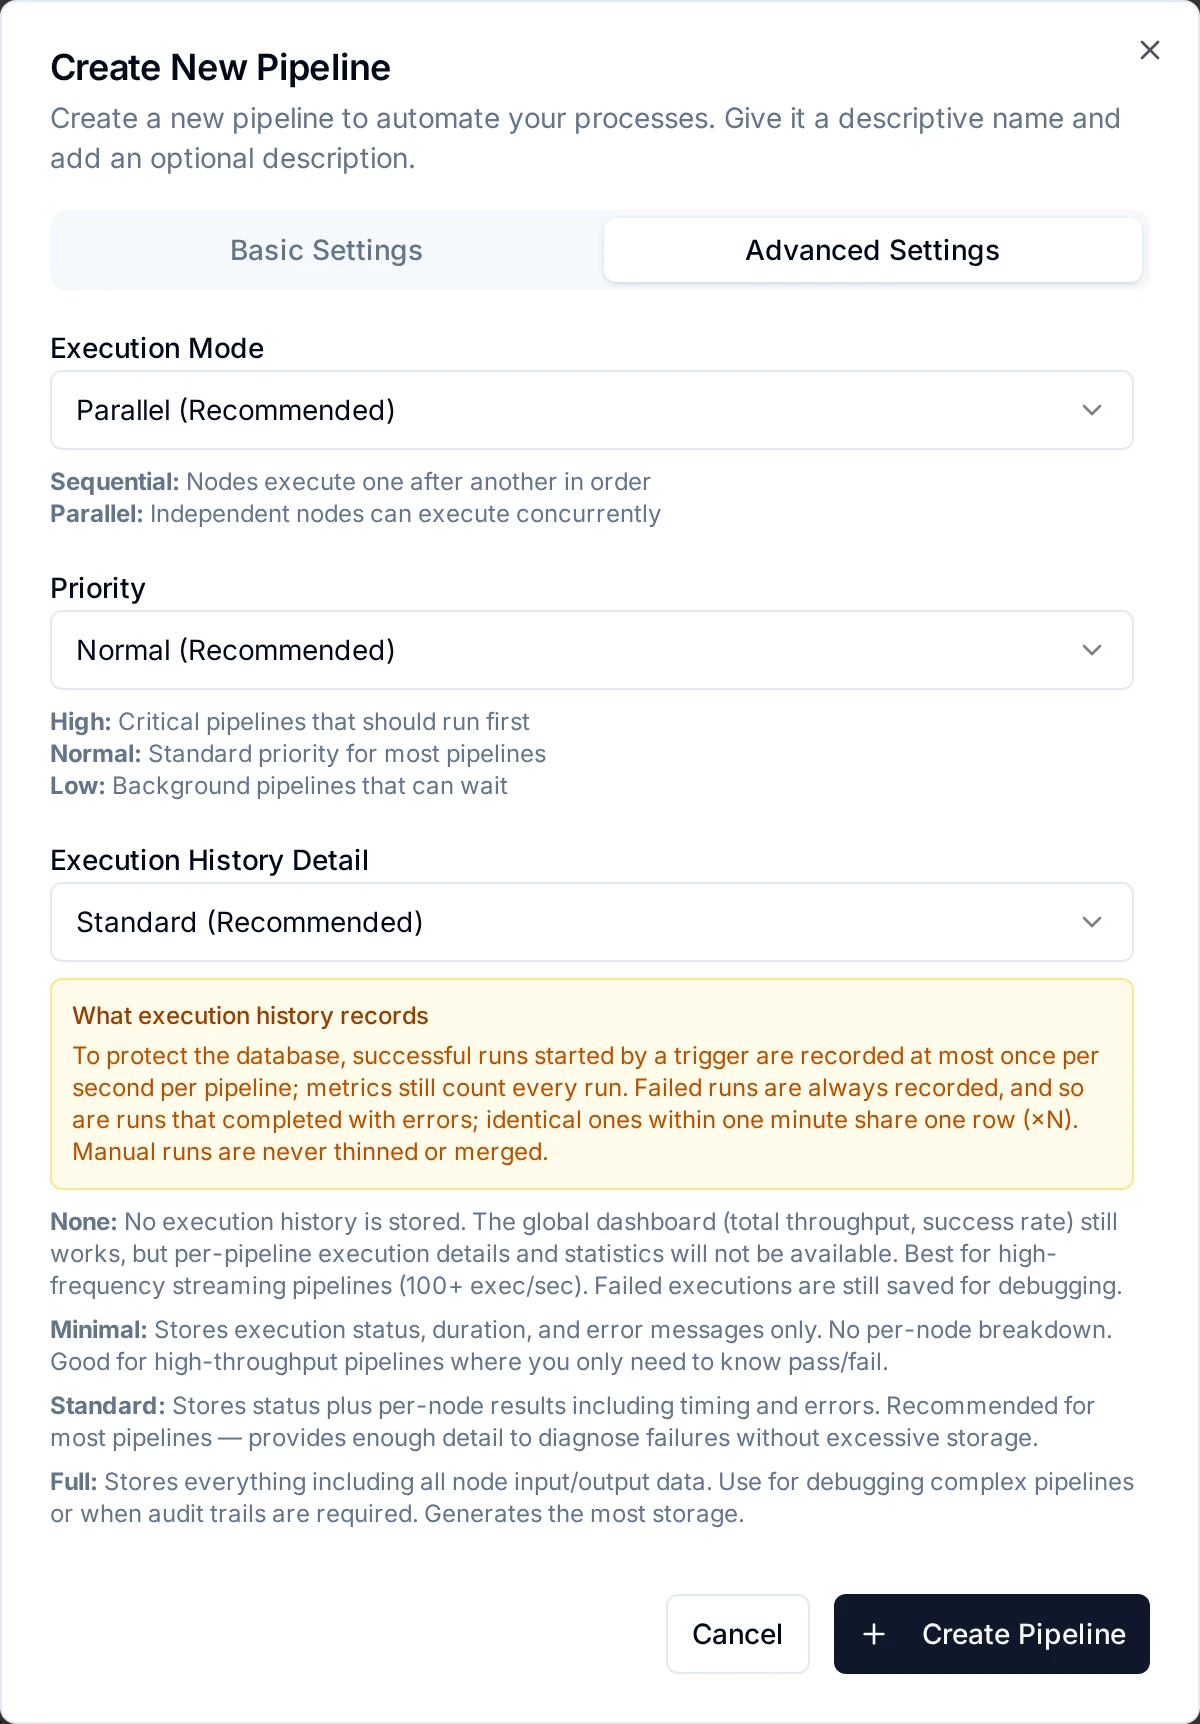
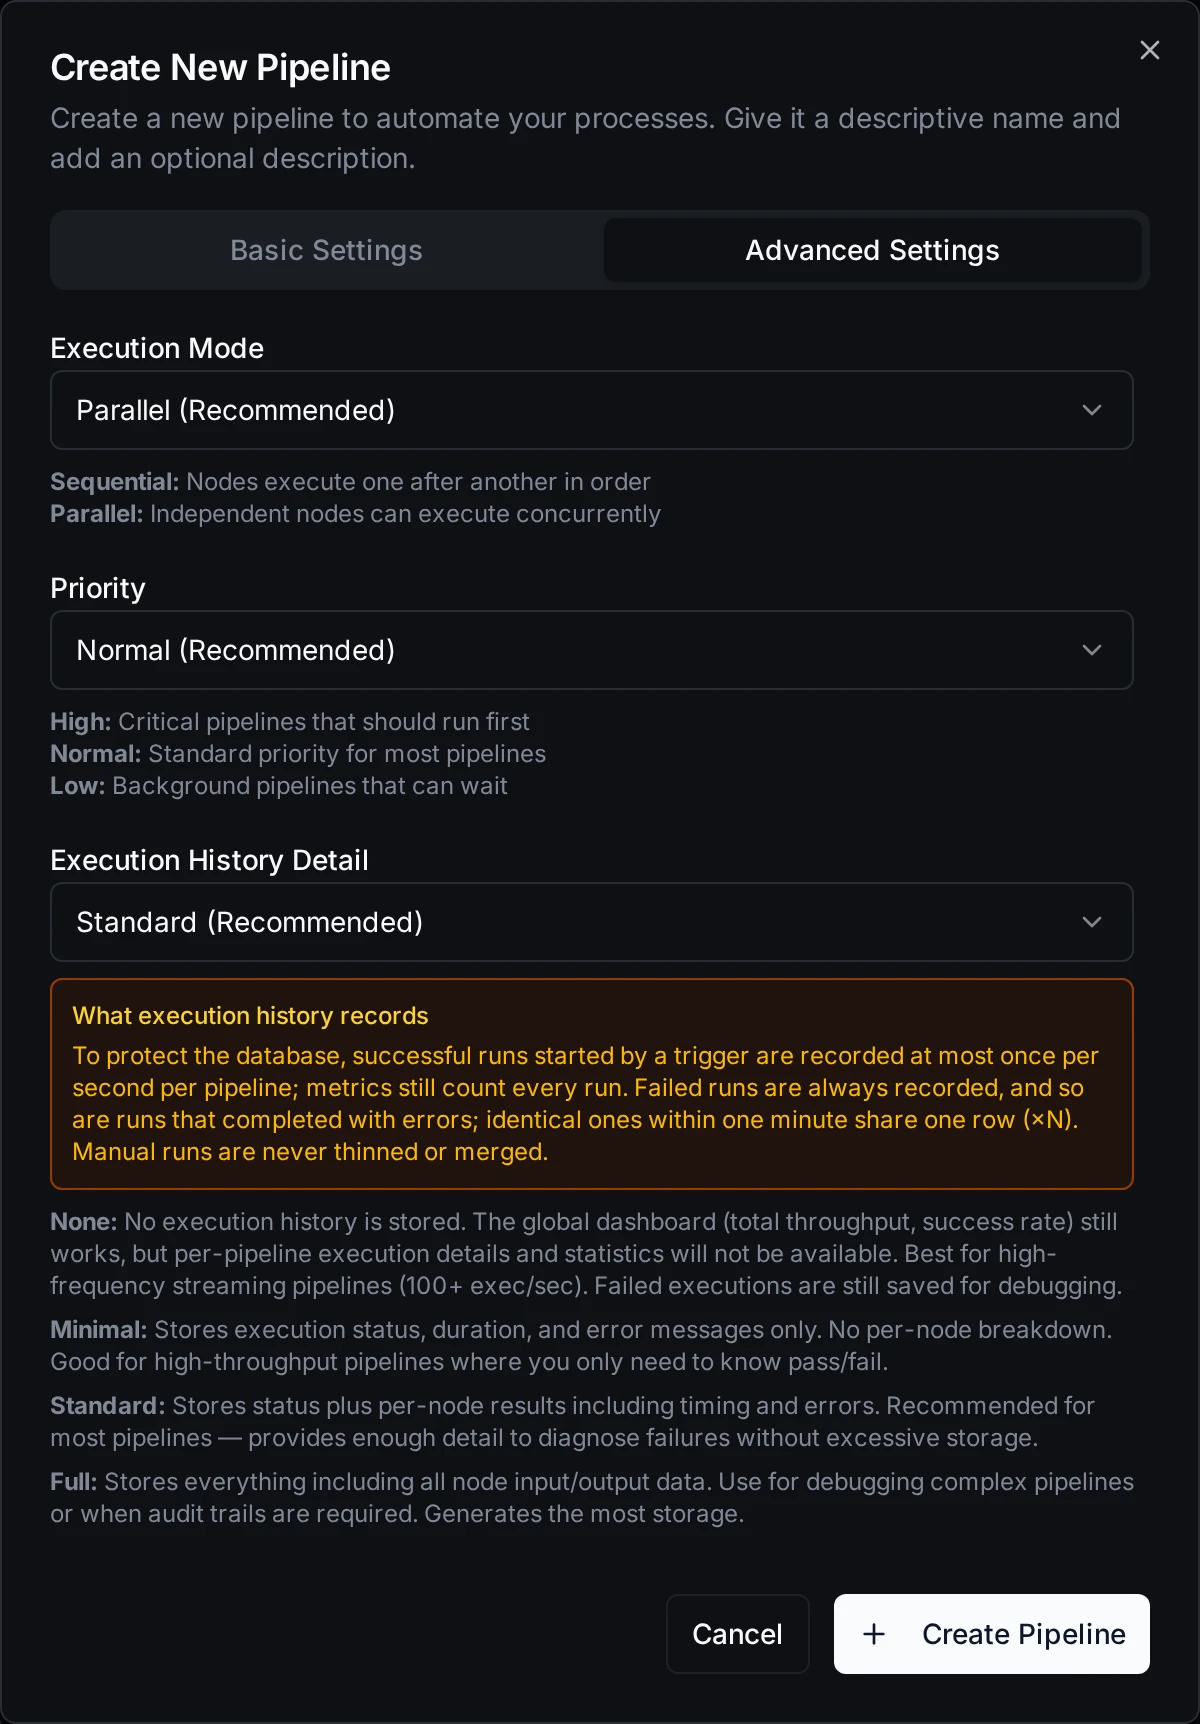
Advanced Settings: execution mode, priority, and execution history detail level.
| Field | Default | Options |
|---|---|---|
| Step execution | Parallel (Recommended) | How the steps inside one run execute. Parallel: independent nodes execute concurrently. Sequential: nodes execute one after another in order. |
| Priority | Normal (Recommended) | High: critical pipelines that should run first. Normal: standard priority for most pipelines. Low: background pipelines that can wait. |
| Run order | Parallel: several runs at once (fastest, order not kept) | How the pipeline's runs relate to each other. Parallel: every trigger fire starts a run as soon as the engine has room; runs overlap and can finish in any order, so outputs can be published in a different order than their inputs arrived. One at a time, in arrival order: runs never overlap and start in the order their triggers fired, so outputs keep that order, at lower throughput. See Output order and Running in order. |
| Execution History Detail | Standard (Recommended) | Minimal: only execution status (fastest, least storage). Standard: status + per-node results (recommended for debugging). Full: everything including input/output data. |
Run timeout (how long one run may take) is not on the create form: a new pipeline gets the default, 30 minutes. To change it, open the pipeline's settings (Edit Pipeline → Advanced → Run timeout) and enter any duration from 1s up to 24h (for example 45m or 6h); leave it empty for the default. See Setting a pipeline's run timeout.
After creating your pipeline, the application redirects you to the Pipeline Designer where you build your workflow.
Output order
With the default run order, Parallel, a pipeline's runs overlap and each one finishes when its own work is done. Two values that arrive on the same topic one after the other can therefore leave the pipeline in the opposite order: if the first run is slower, the second run publishes first.
For example, a pipeline subscribes to line1/press/temperature and publishes a converted value to line1/press/temperatureF:
| Arrives on the input topic | Run | Run takes | Published on the output topic |
|---|---|---|---|
71.2 at 10:00:00.000 | run 1 | 150 ms (its first call to a database, for example) | 160.2 at 10:00:00.150 |
71.4 at 10:00:00.020 | run 2 | 5 ms | 160.5 at 10:00:00.025 |
A subscriber to line1/press/temperatureF receives 160.5 before 160.2, and its "latest value" ends up being the older reading. Nothing is lost or duplicated; only the order changes. A run is slower than its neighbours for ordinary reasons: the first message on a new topic, a cache that is still cold, a slow destination, a retry.
This is the contract of Parallel, not a fault, and for many pipelines it does not matter: readings that carry their own timestamp, values written to a historian that sorts by time, independent events. Choose One at a time, in arrival order when the order of the outputs is part of their meaning:
- the output is a setpoint or command, where the last write must be the newest value;
- the pipeline keeps state between runs (a running total, a counter, a last-seen value);
- a downstream system reads only the latest value of a topic, or requires its input in sequence.
The cost is throughput: runs of that pipeline no longer overlap (see below). Other pipelines are not affected.
Running in order
Choose Run order → One at a time, in arrival order for a pipeline whose runs must not overlap or swap places, for example one that writes successive values to a machine, keeps a running total, or forwards readings that a downstream system must receive in sequence.
- What is guaranteed: the pipeline's runs start one at a time, in the order the execution queue accepted their trigger fires. That holds across engine replicas, through retries (a failed run is retried before the next one starts), restarts and failovers. A run that still fails after its retries is set aside in the dead-letter queue, and the next one starts.
- If an engine replica crashes: the runs it had taken (the one running and the ones waiting behind it) are handed to another replica only when their delivery lease runs out (up to 5 minutes), and the pipeline's later runs wait behind them, so the order holds. A replica that is stopped or restarted normally hands its runs over at once.
- Seeing the queue: while a pipeline runs in order, the designer's toolbar shows how many of its runs are waiting (In order · N in queue).
- What it costs: throughput. Each run waits for the previous one, so a pipeline that takes 200 ms runs at most five times a second; fires that arrive faster wait in the queue and run later, in order, nothing dropped.
- Other pipelines are not held up: a slow in-order pipeline delays only its own runs. Priority still applies: a high-priority in-order pipeline goes before normal work.
- Schedule triggers (cron, interval) already run one at a time and skip a fire that arrives while the previous one is still running; Run order does not change that.
Change it any time in Edit Pipeline → Advanced → Run order. Runs already queued keep their order through the change.
Error Handling
Pipeline-wide error handling is not on the create form. Open the pipeline's settings and choose the Error Handling tab (Edit Pipeline → Error Handling). These settings are the defaults for every node in the pipeline. A node whose own setting is Pipeline Default uses the value from this tab, and any node can override them in its Settings tab (see Error Handling on the Nodes page).
| Setting | Description |
|---|---|
| Timeout (seconds) | Maximum execution time per node, 1-3600 seconds. |
| Retry on Timeout | Retry a node that times out. |
| Retry on Fail | Retry a node that fails. Turning it on shows Advanced Retry Configuration with the same retry settings a node has (see Advanced Retry Settings). |
| On Error | What happens when a node still fails after its retries: Stop Pipeline or Continue Execution. See Run status and On Error. |
Pipeline Designer
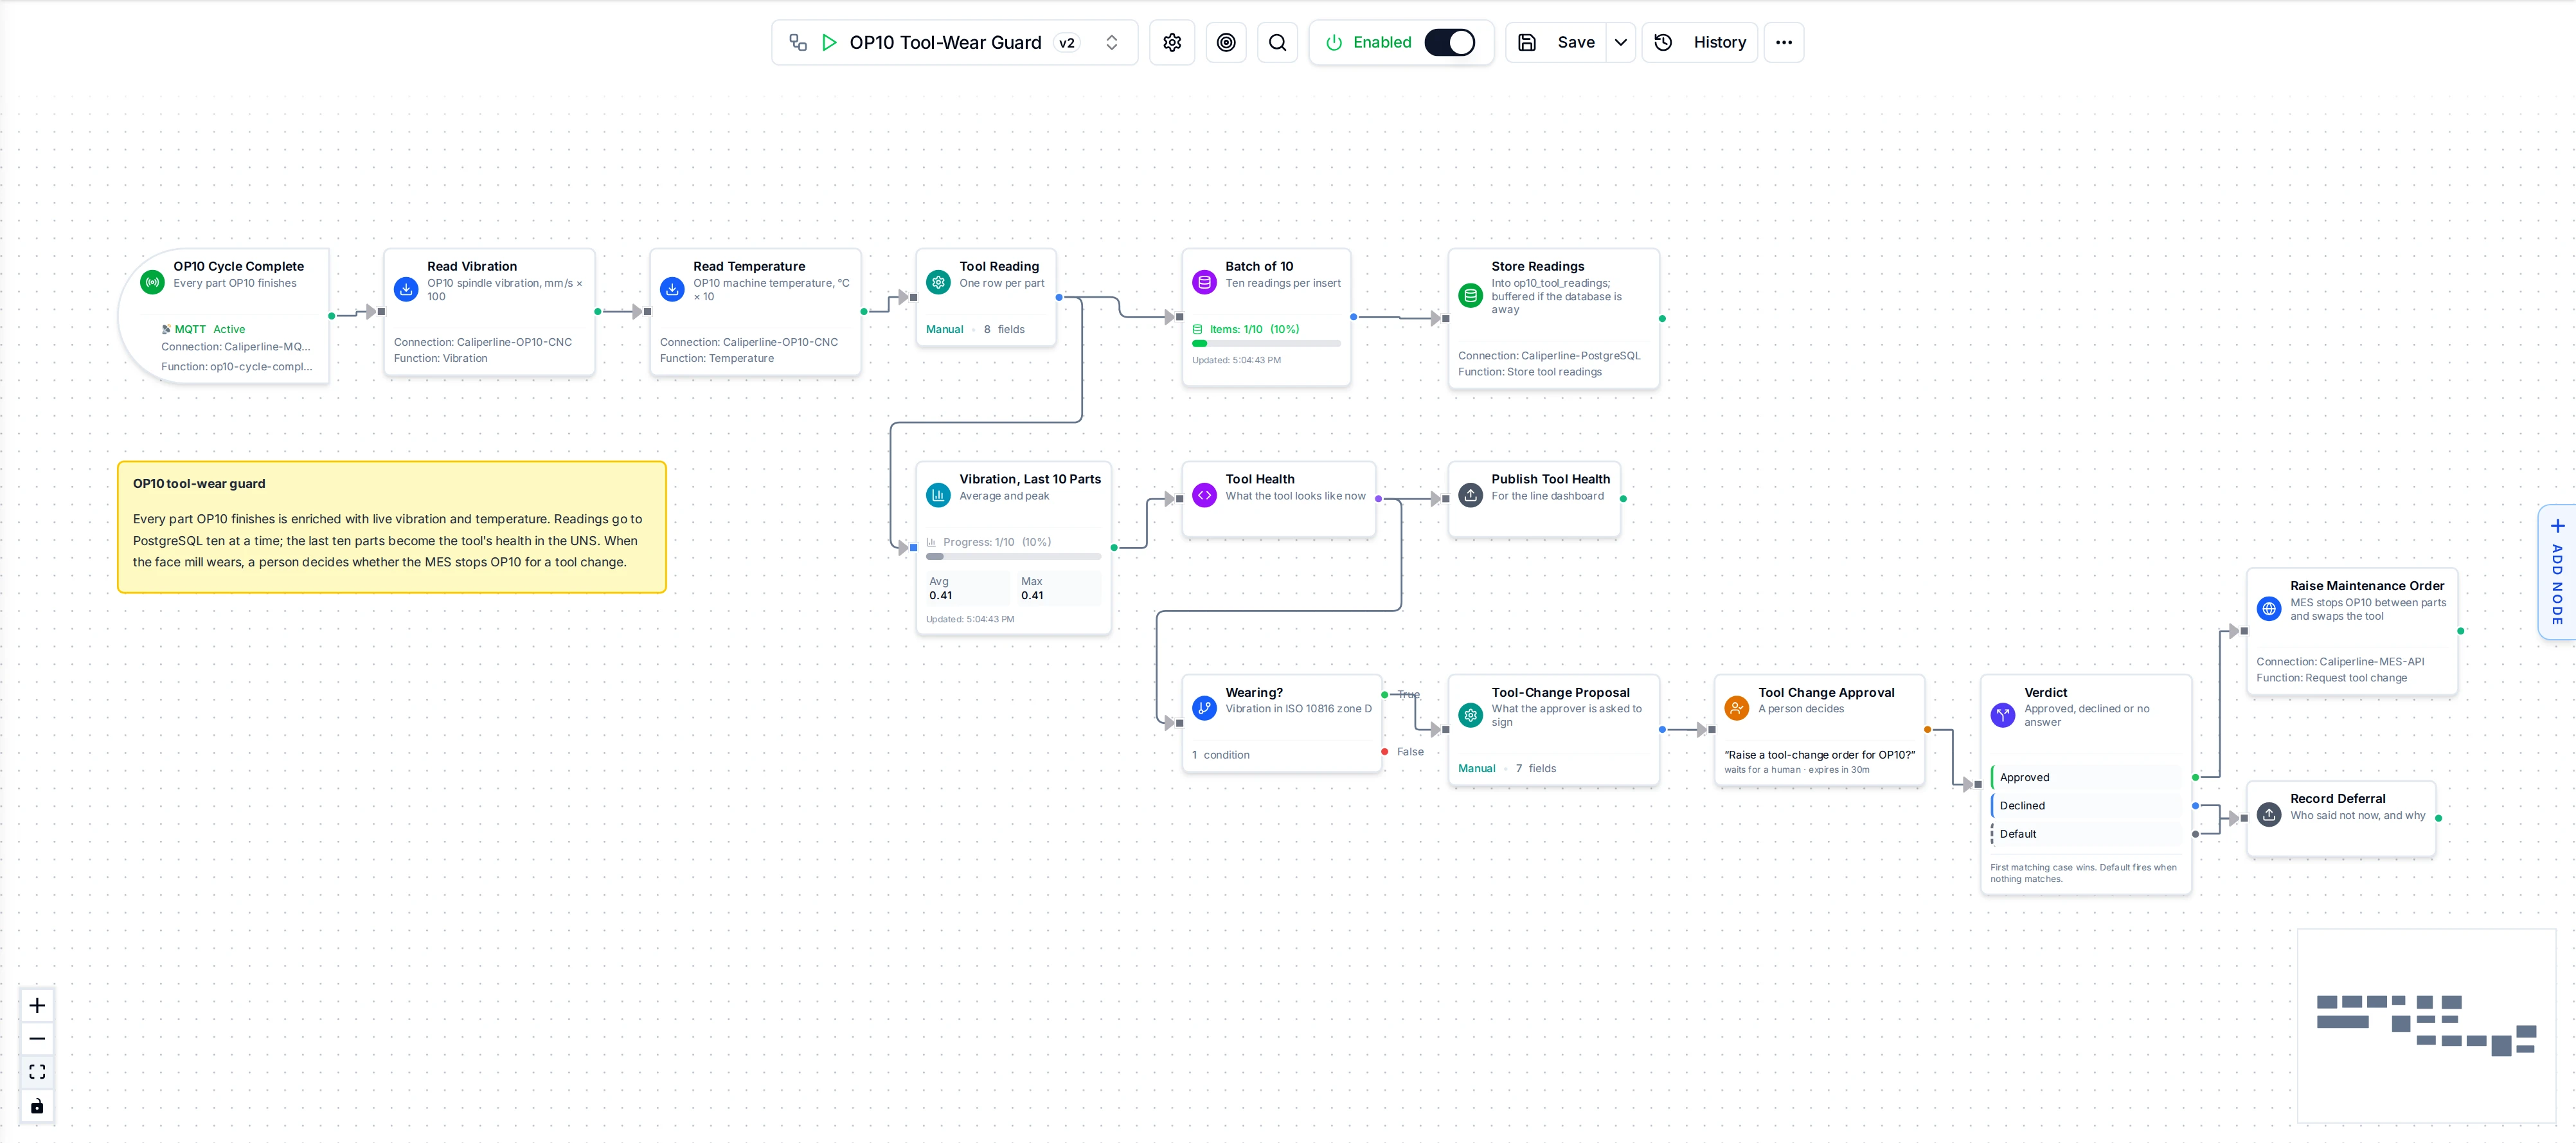
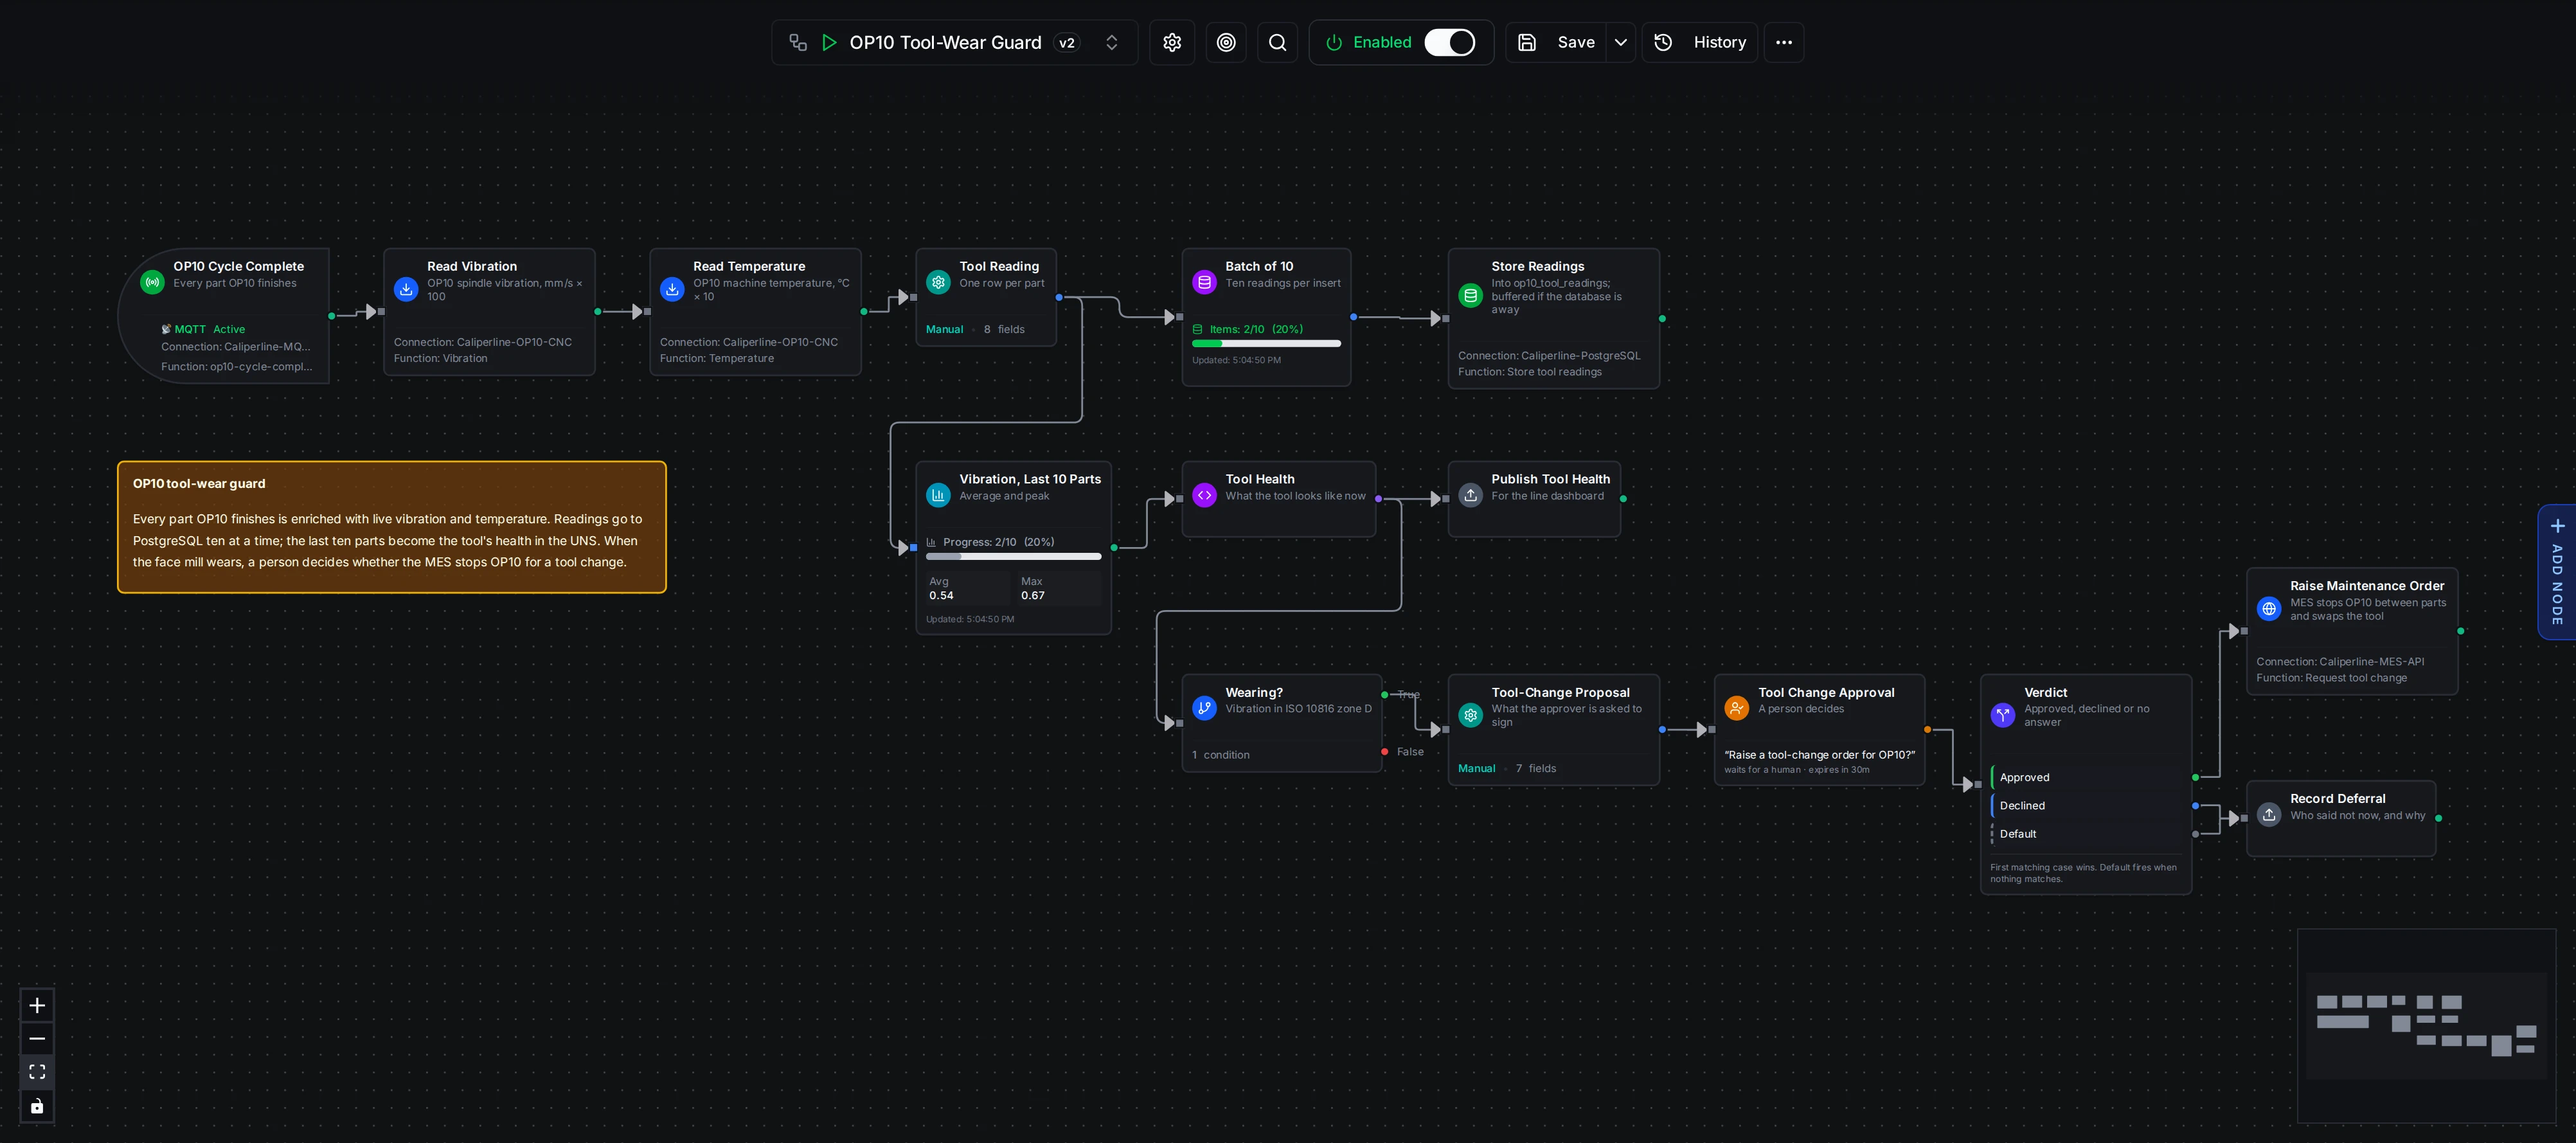
The OP10 tool-wear guard in the Pipeline Designer: each part's vibration and temperature are read, buffered in batches of ten into PostgreSQL, averaged over the last ten parts, graded by a shared function, published to the UNS, and a worn tool waits for a person to approve the maintenance order.
The Pipeline Designer is a visual canvas where you build workflows by dragging nodes, drawing connections, and configuring logic. The canvas supports zoom, pan, multi-select, and a minimap for navigating large pipelines.
Toolbar
The toolbar at the top provides quick access to pipeline controls:
| Button | Description |
|---|---|
| Pipeline Selector | Dropdown to switch between pipelines without leaving the designer. |
| Enabled / Disabled | Toggle to activate or deactivate pipeline execution. |
| Save | Saves all changes. Shows a badge with the number of unsaved changes. |
| History | Opens the Execution History sidebar on the right. |
| ⋯ More actions | Opens a menu with the pipeline's secondary tools (see below). |
| Center | Fits all nodes into view. |
The ⋯ More actions menu holds:
| Item | Description |
|---|---|
| Versions | Opens the version history sidebar. See Pipeline Version History. Hidden while you are in Execution Replay. |
| Diagnostics | Checks the pipeline's structure and node connections and lists what it finds: Unused Trigger, Orphan Node, Unreachable Dependency, and Mutually Exclusive Dependencies. Click a node name in a finding to jump to that node on the canvas. When nothing is wrong, it shows No issues found. |
| Store & Forward | Opens the Store & Forward page on its Buffers tab, scoped to this pipeline. |
| Functions (N) | Shown only when the pipeline uses functions from the shared function library. Opens Functions in use. |
| Metrics | Shows or hides the Pipeline Metrics panel. |
| Timeline | Shows or hides the skip timeline (see Skip Timeline). |
Context Menu
Right-click on the canvas to access common actions:
| Action | Shortcut |
|---|---|
| Add node | Tab |
| Add sticky note | Shift + S |
| Save as Template (shown only when nodes are selected) | - |
| Save pipeline | Ctrl + S |
| Refresh pipeline | F5 |
| Reset execution counters | - |
| Tidy up pipeline | Alt + T |
| Select all | Ctrl + A |
Testing Nodes
The designer has no button that runs the whole pipeline. You test one node at a time: open a node and click Test Node. When the node or a node feeding it talks to an external system, a Sandbox | Live control next to the button decides whether the run does real I/O. See Node Configuration & Testing.
When the pipeline runs while it is open in the designer, nodes update in real time to show their current status.
For nodes inside a For-Each loop, the live view shows a sample of the iterations (the first few, periodic snapshots and the last) while the tile's count stays exact; every iteration is available afterwards from Execution History. See Watching a Loop Run.
Node Types
MaestroHub provides a growing library of nodes organized into categories. Open the Add Node panel (press Tab or click the + button) to browse and drag nodes onto the canvas. The panel has three tabs: Categories, All, and Favorites.
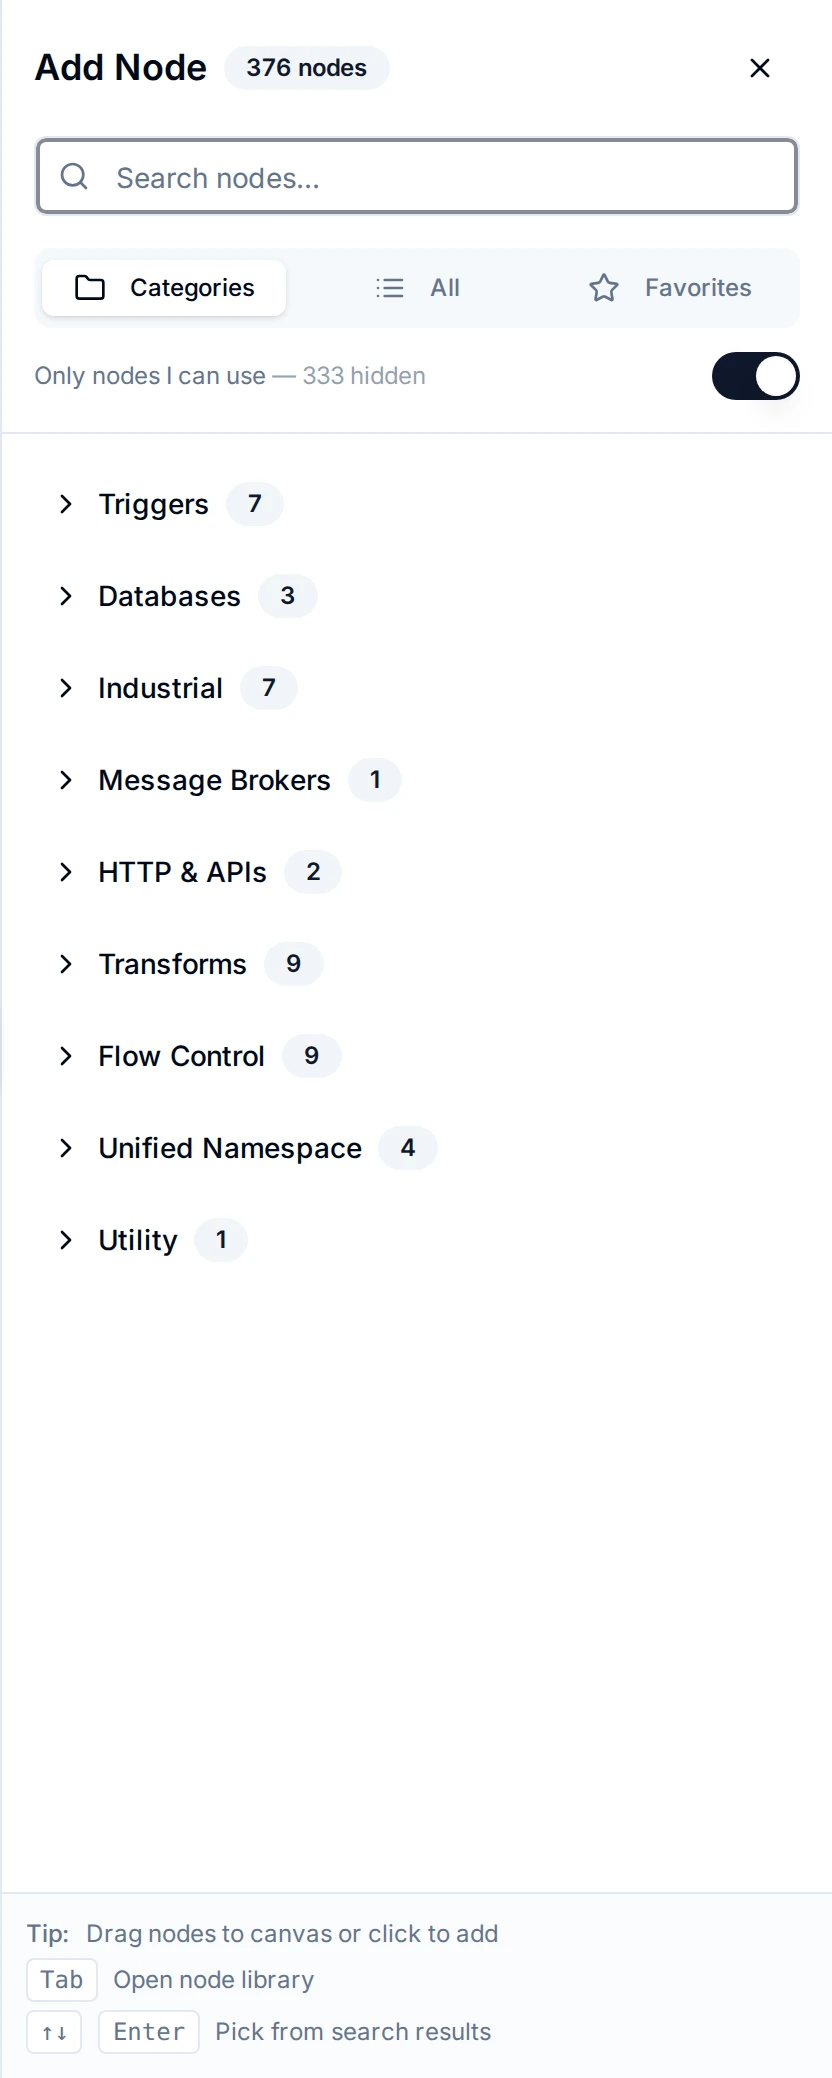
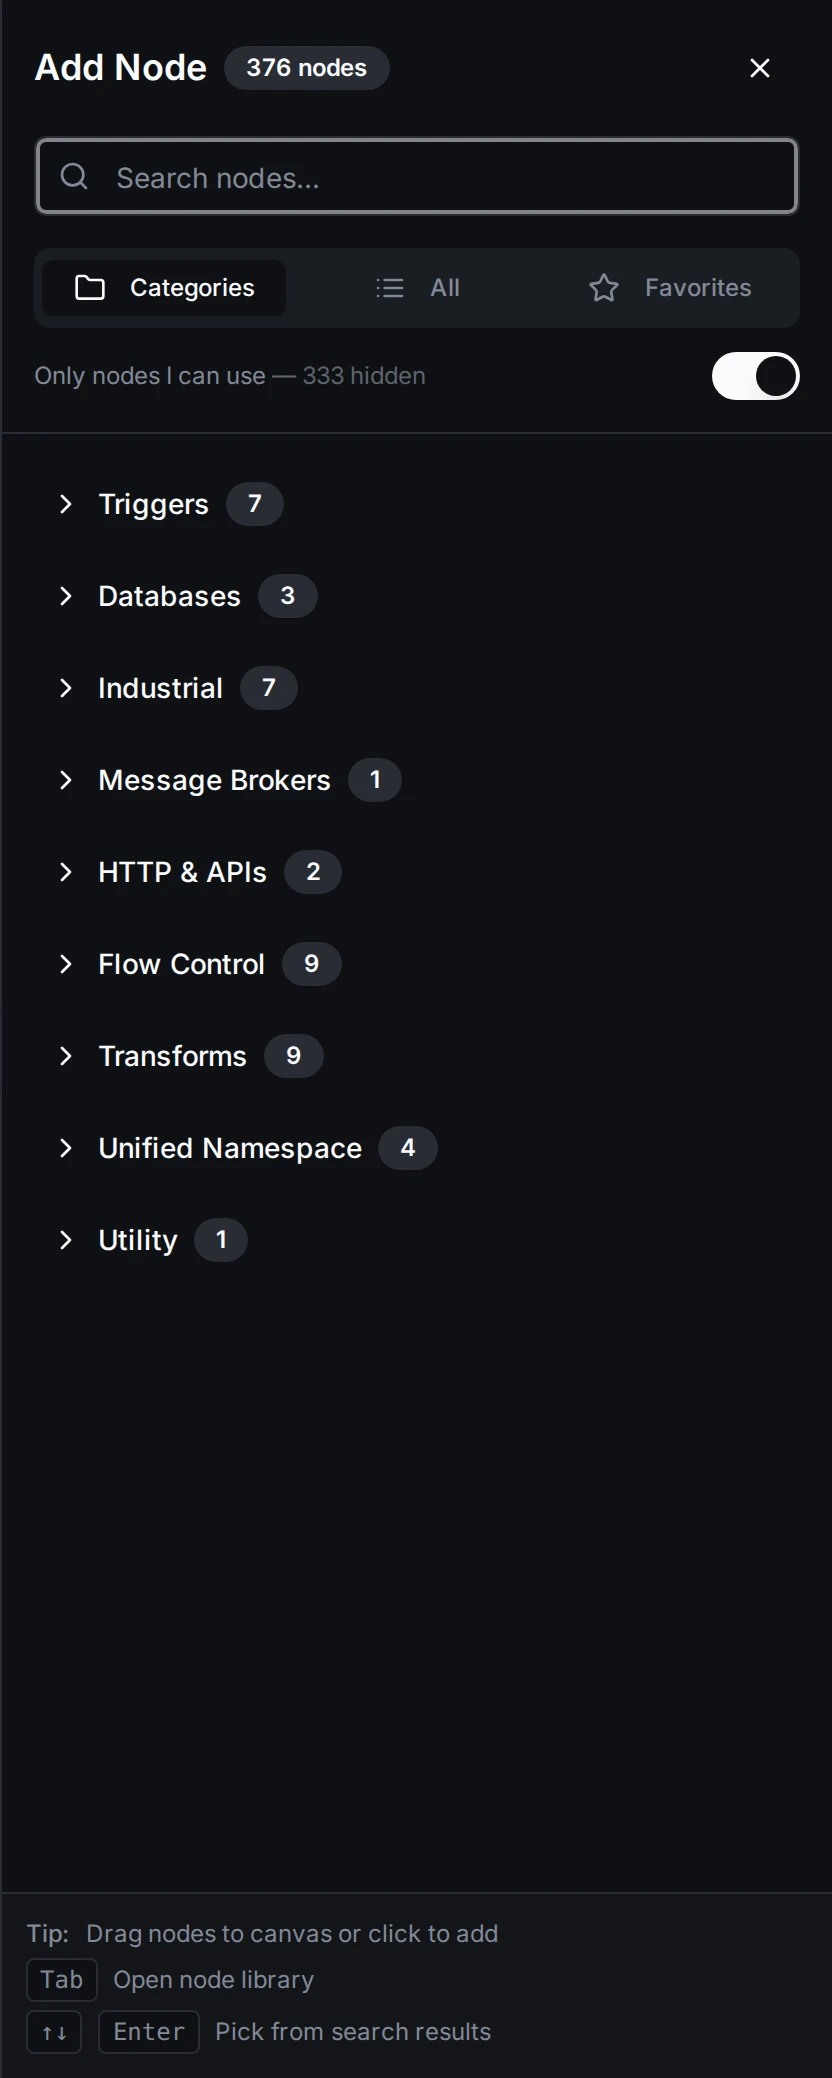
Add Node panel with Categories, All, and Favorites tabs.
| Category | Examples |
|---|---|
| Triggers | Manual, Schedule, Webhook, MQTT, OPC UA, Pipeline Event |
| Industrial | OPC UA Read/Write, Modbus Read/Write, S7 Read/Write, OPC DA Read |
| Databases | PostgreSQL, MSSQL, MySQL, Oracle, MongoDB |
| Time Series | InfluxDB, QuestDB, Prometheus, Timestream |
| Message Brokers | MQTT Publish, Kafka Produce, RabbitMQ Publish, NATS Publish |
| Storage | S3 Fetch/Write, Local File, FTP, Azure Blob |
| HTTP & APIs | REST Request, SOAP Invoke, AWS Lambda Invoke, Smart Connector |
| Notifications | MS Teams, Slack Send Message, SMTP Send |
| Flow Control | Condition, Switch, Merge, For-Each, Wait, JavaScript, Approval |
| Transforms | Set, Buffer, Aggregator, Group By, File Extractor, Convert to File |
| AI | AI Agent (Beta, with Maestro), Gemini Generate Content |
| Unified Namespace | UNS Publish, UNS Publish (Batch), UNS Fetch Data, UNS Search Nodes |
| Utility | Sticky Note |
Triggers are always listed first. The other categories are ordered by how many nodes they hold.
The node library grows continuously with new integrations and capabilities. For detailed documentation on specific node types, see the Nodes documentation.
Templates
A template saves a selected group of nodes and the connections between them.
To create one, select nodes on the canvas, right-click the canvas, and choose Save as Template. The option appears only while nodes are selected.
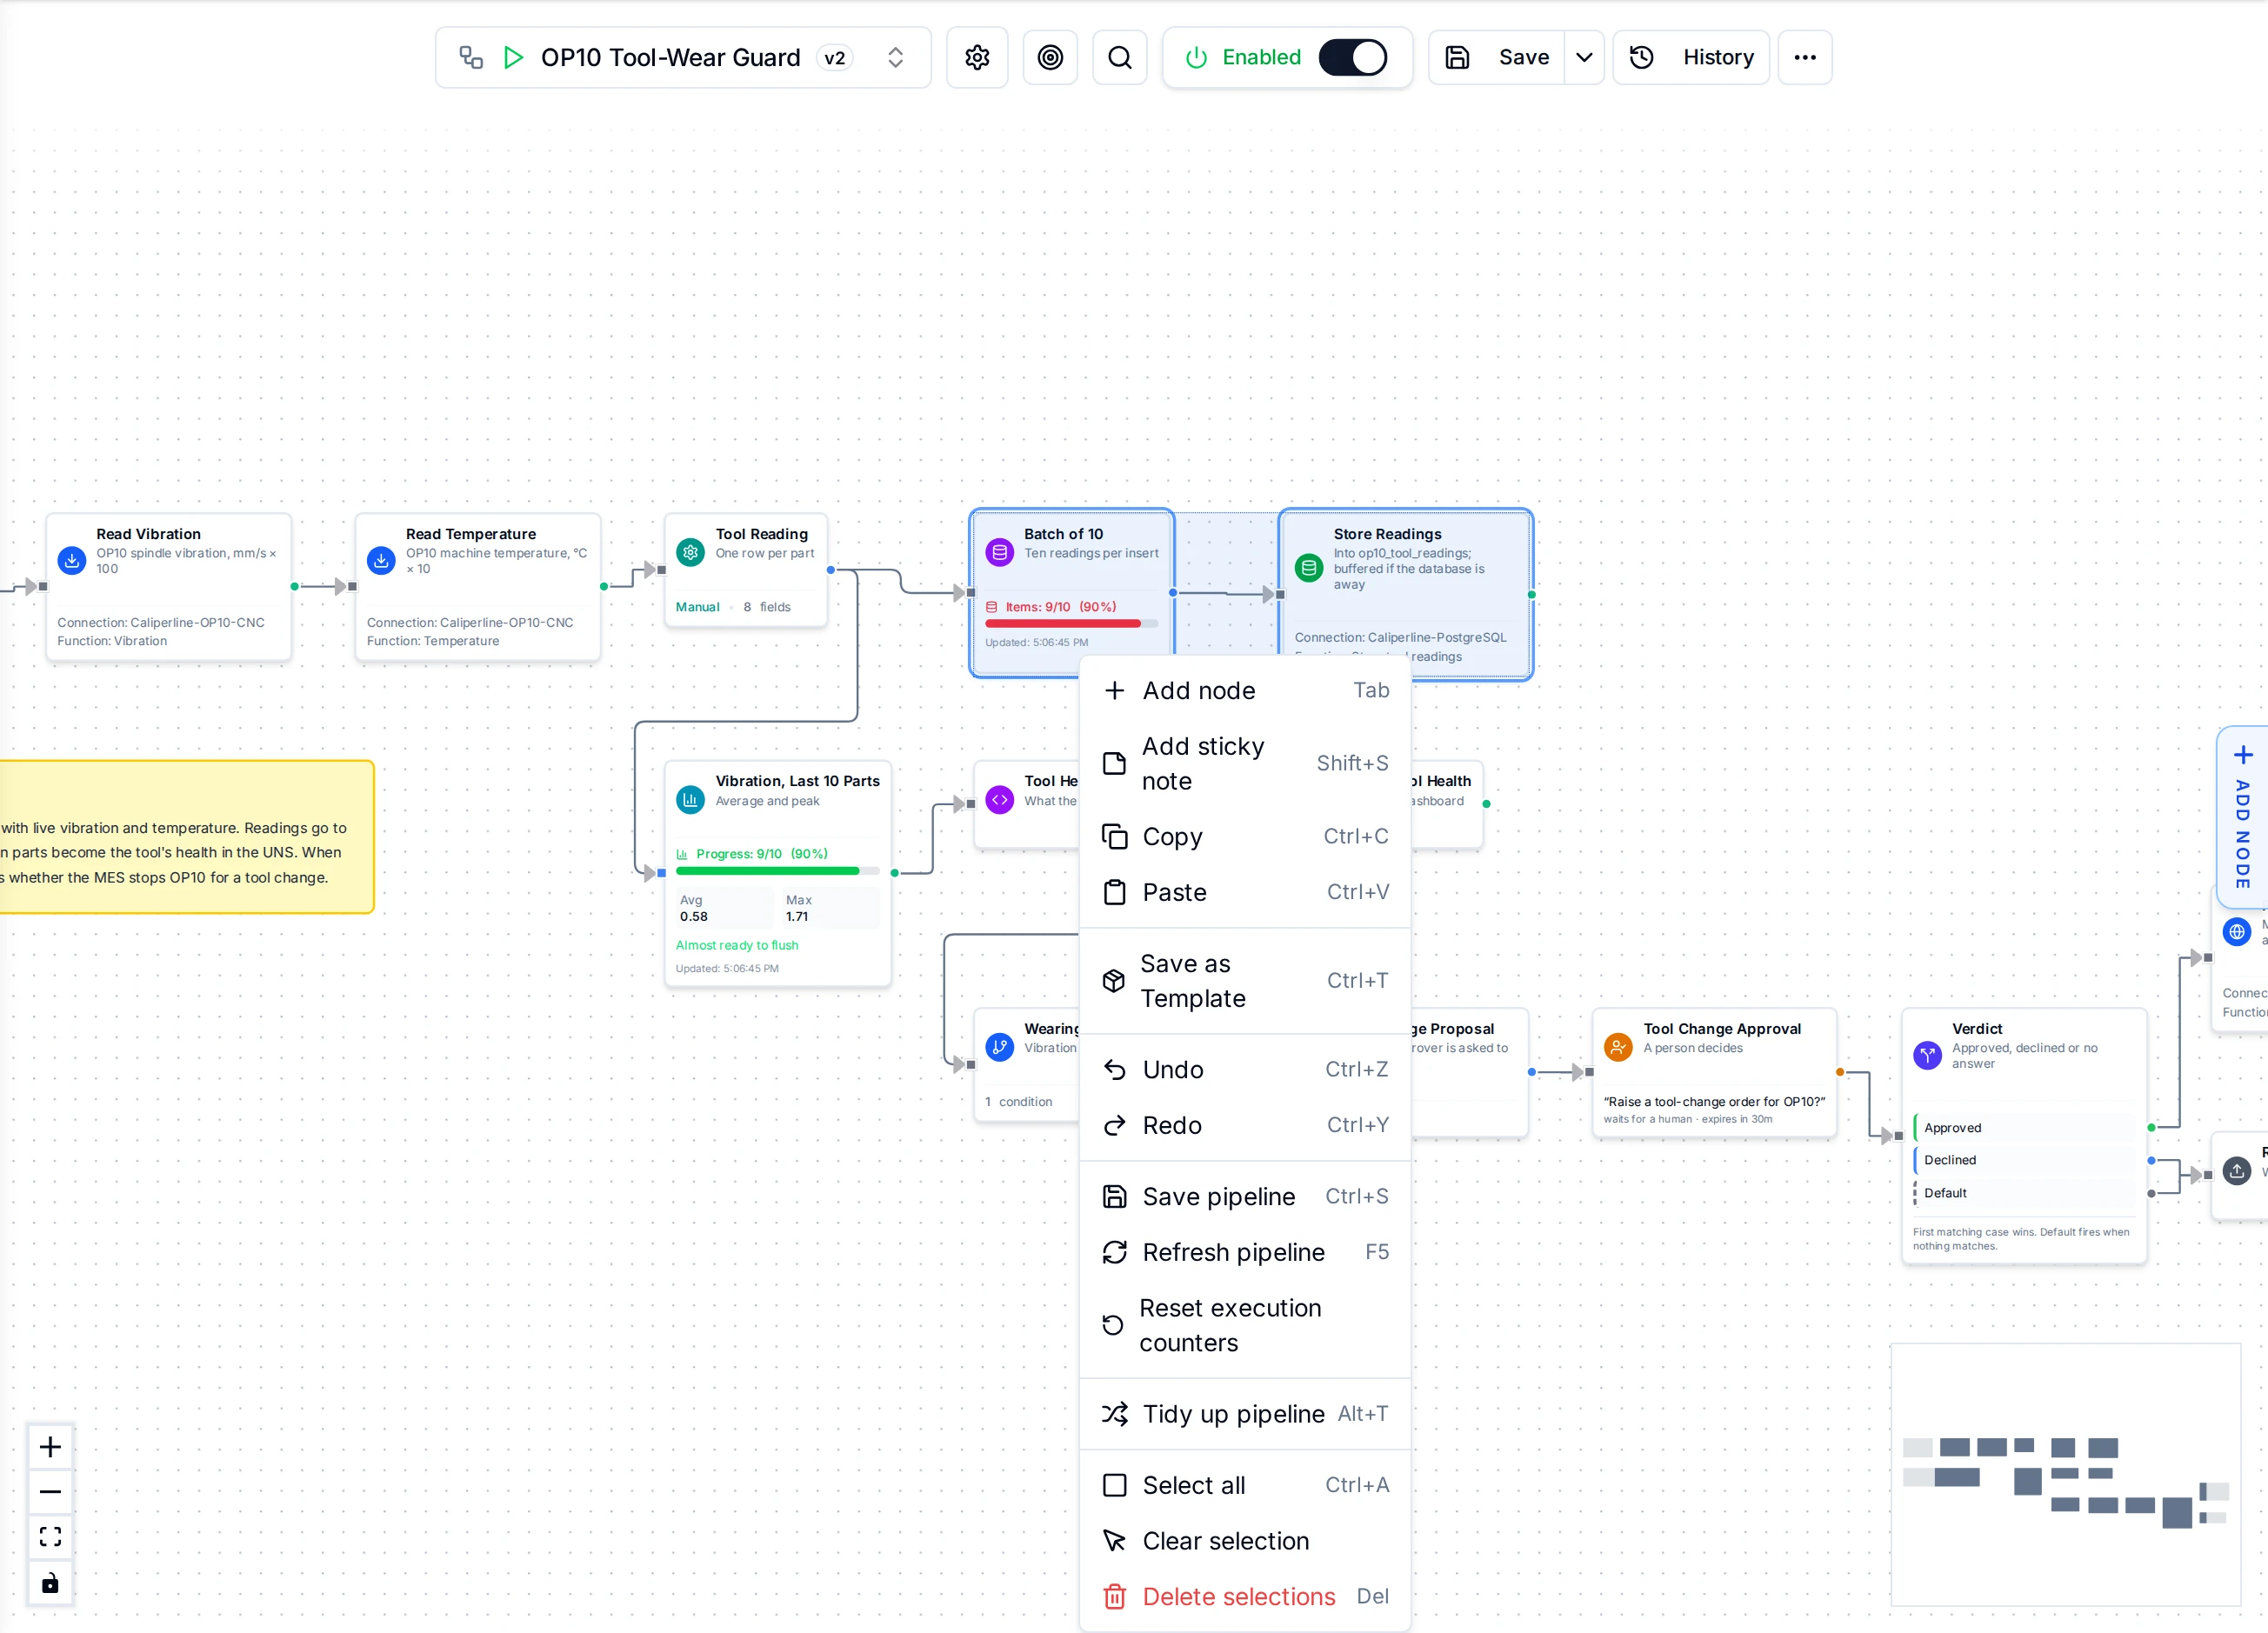
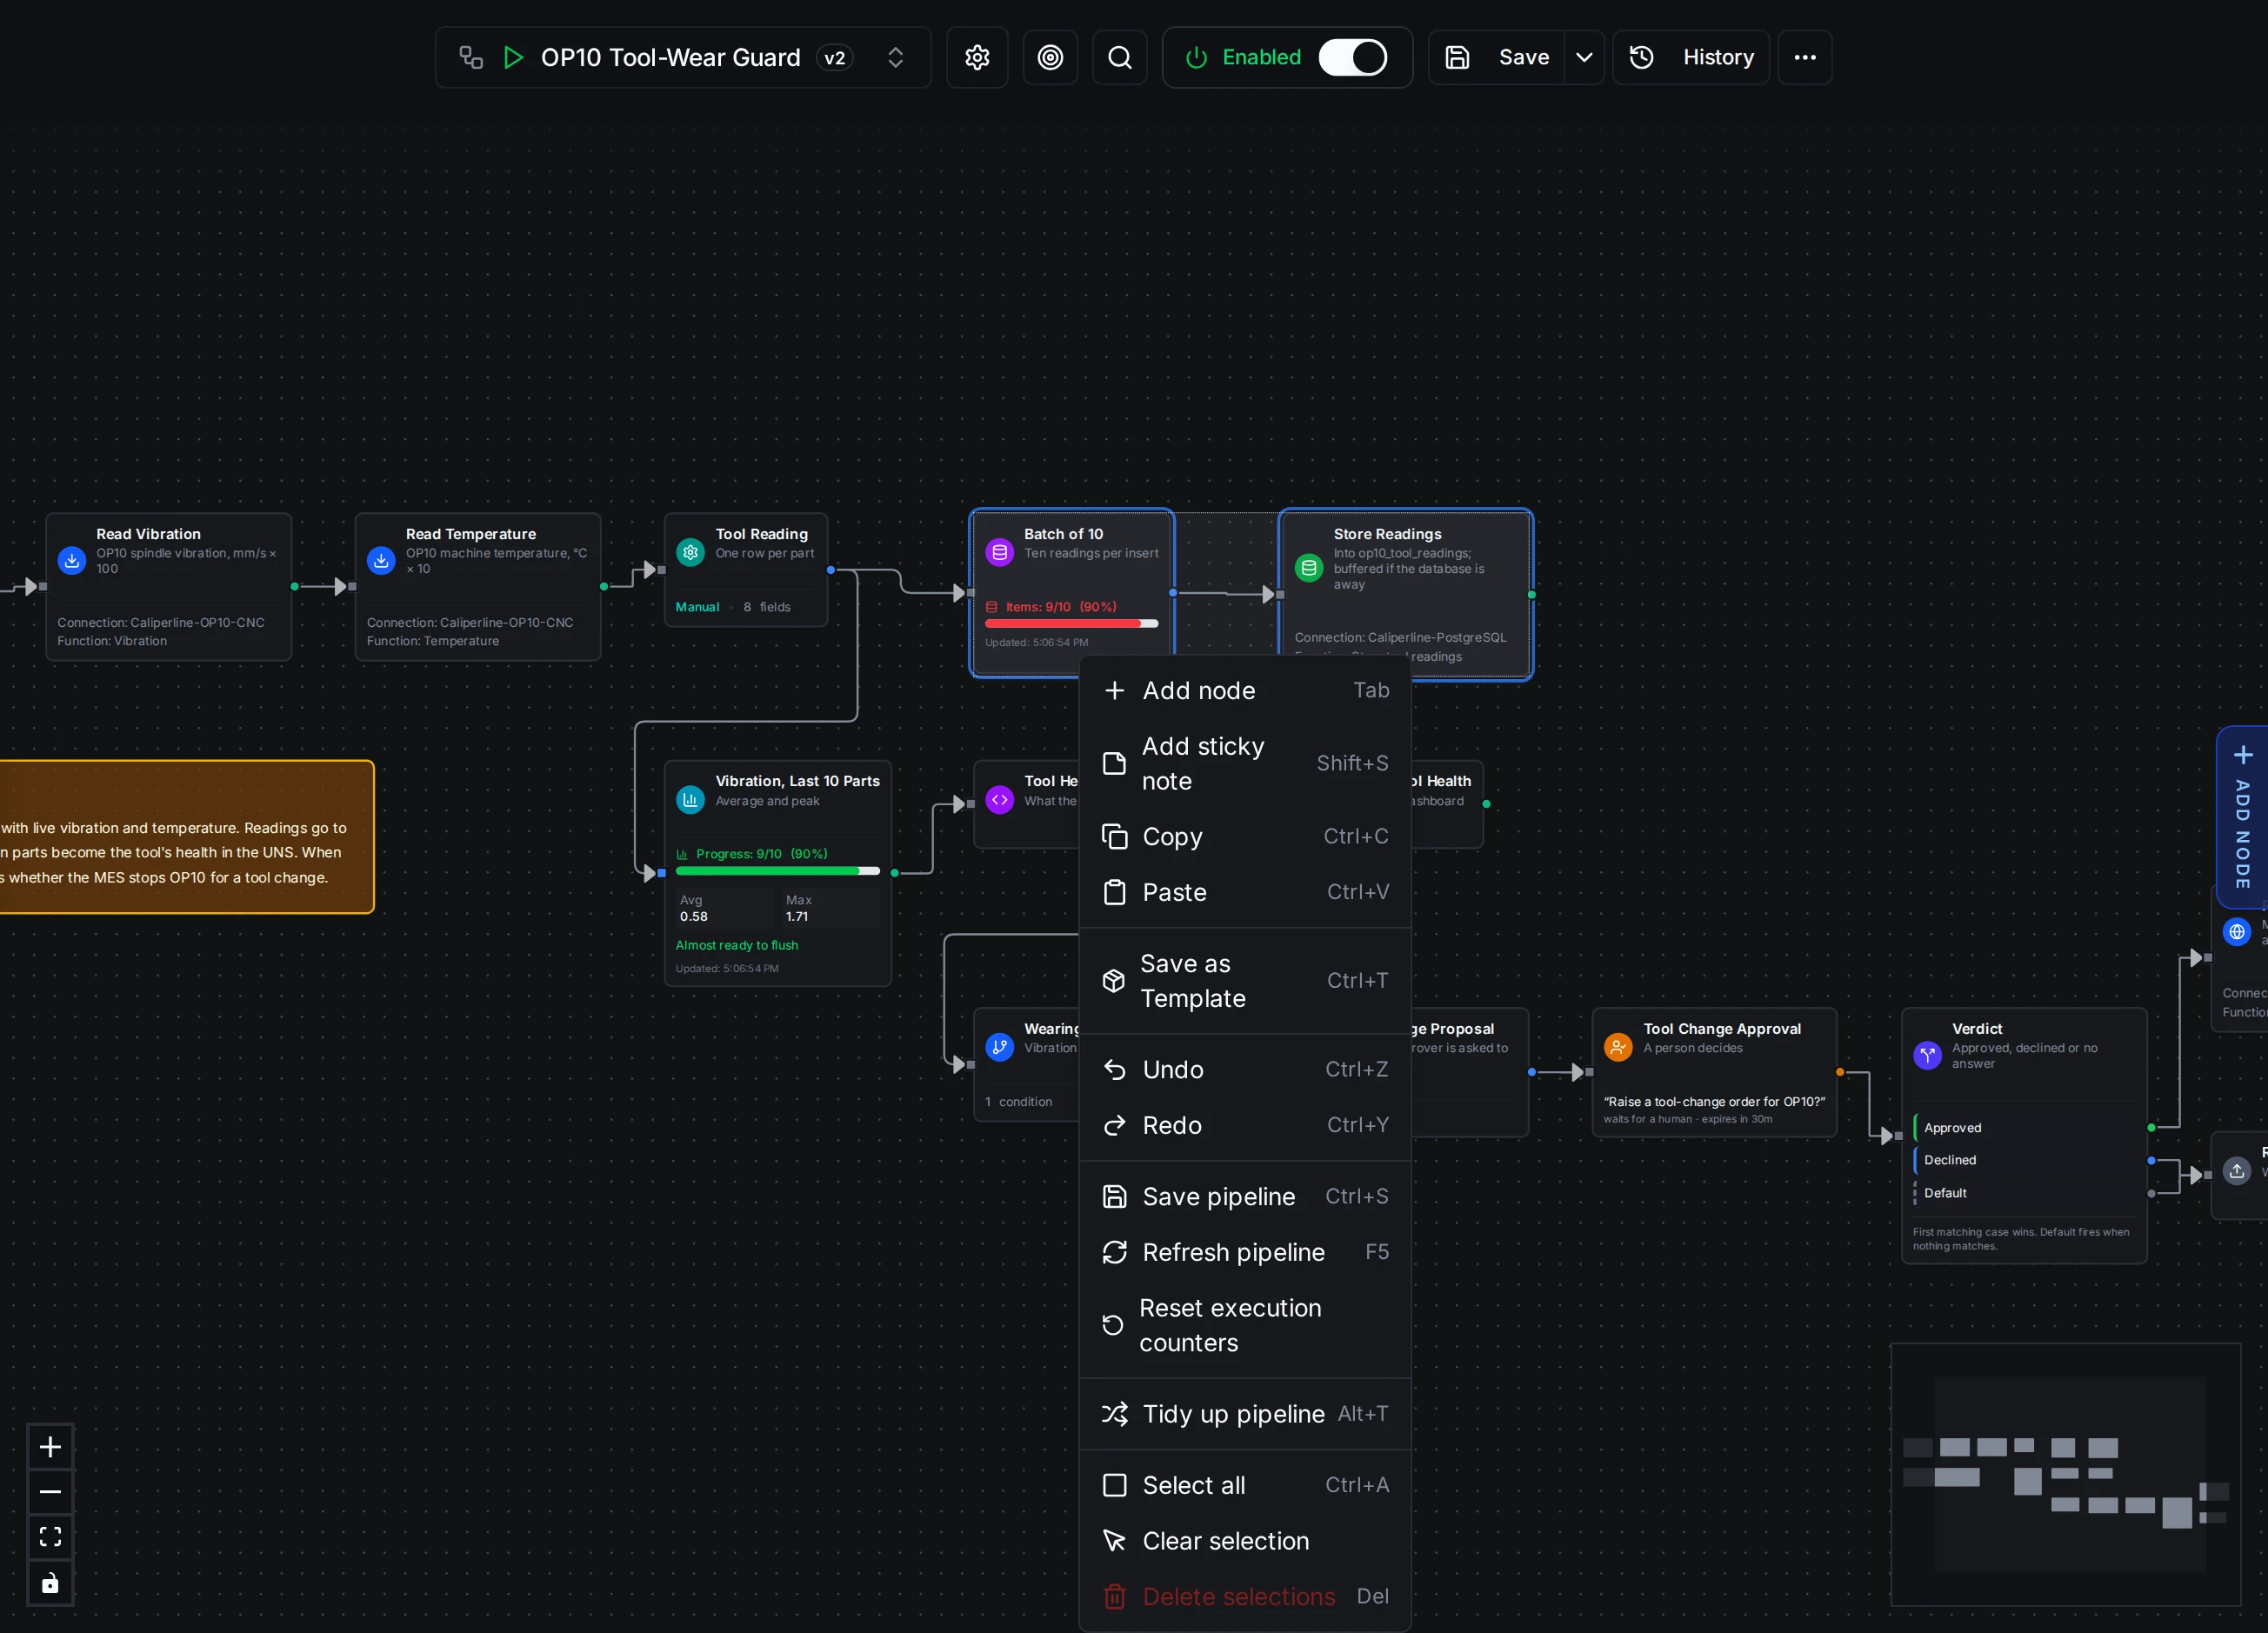
Two selected nodes, the Batch of 10 buffer and its PostgreSQL write, with Save as Template in the canvas context menu.
Node Configuration
Each node follows a standardized configuration structure with Basic Information, Parameters, and Settings tabs. When you select a node on the canvas, the configuration panel opens on the right side.
For detailed information about node configuration structure, error handling strategies, and best practices, see the Nodes documentation.
What a Pipeline May Access
A pipeline may touch exactly what its nodes use: the topics it reads, publishes and subscribes to, and the connector functions it calls. Nothing more.
- It is set when the pipeline is saved. Whenever a save adds, changes or removes a topic or function, the pipeline's access is updated to match. Saving a layout change or a new value changes nothing.
- It belongs to the pipeline. It does not depend on who built the pipeline. A pipeline keeps running when its author changes role or leaves.
- Computed topics keep their fixed parts. A topic such as
…/{{ $node["Base"].result }}/ToolActDuploreaches only topics ending inToolActDuplo. A topic computed entirely at run time reaches the pipeline's workspace, never beyond it. - Connector nodes reach their functions, not the whole connection. A Modbus Read node may run that one function. A read group that lists its functions may run exactly those; one that reads all functions, or reads by label, may run the connection's read functions but never its writes. A function chosen at run time (by name or by an expression) may be any function.
With Advanced Access Control turned on, a save can be refused:
| Message | What it means | What to do |
|---|---|---|
| This change needs access you don't hold | The save adds a topic or function you may not use yourself, so you can't give it to a pipeline. The node is marked on the canvas. Access you hold on one connection, on single functions, or on read functions only counts. | Ask someone who holds it to make the change, or ask an administrator for the access. Editing the rest of the pipeline is not affected. |
| Couldn't check access, so nothing was saved | The check could not run. | Save again in a moment. |
Turning Advanced Access Control on or off never stops a pipeline: its access is already in place. To stop a pipeline, disable it, or have an administrator deny the pipeline the access.
Execution History
Navigation: Orchestrate → Execution History
The Execution History page shows a global table of all pipeline executions across the entire system. Use it to search across pipelines, track specific runs, and monitor overall execution health.
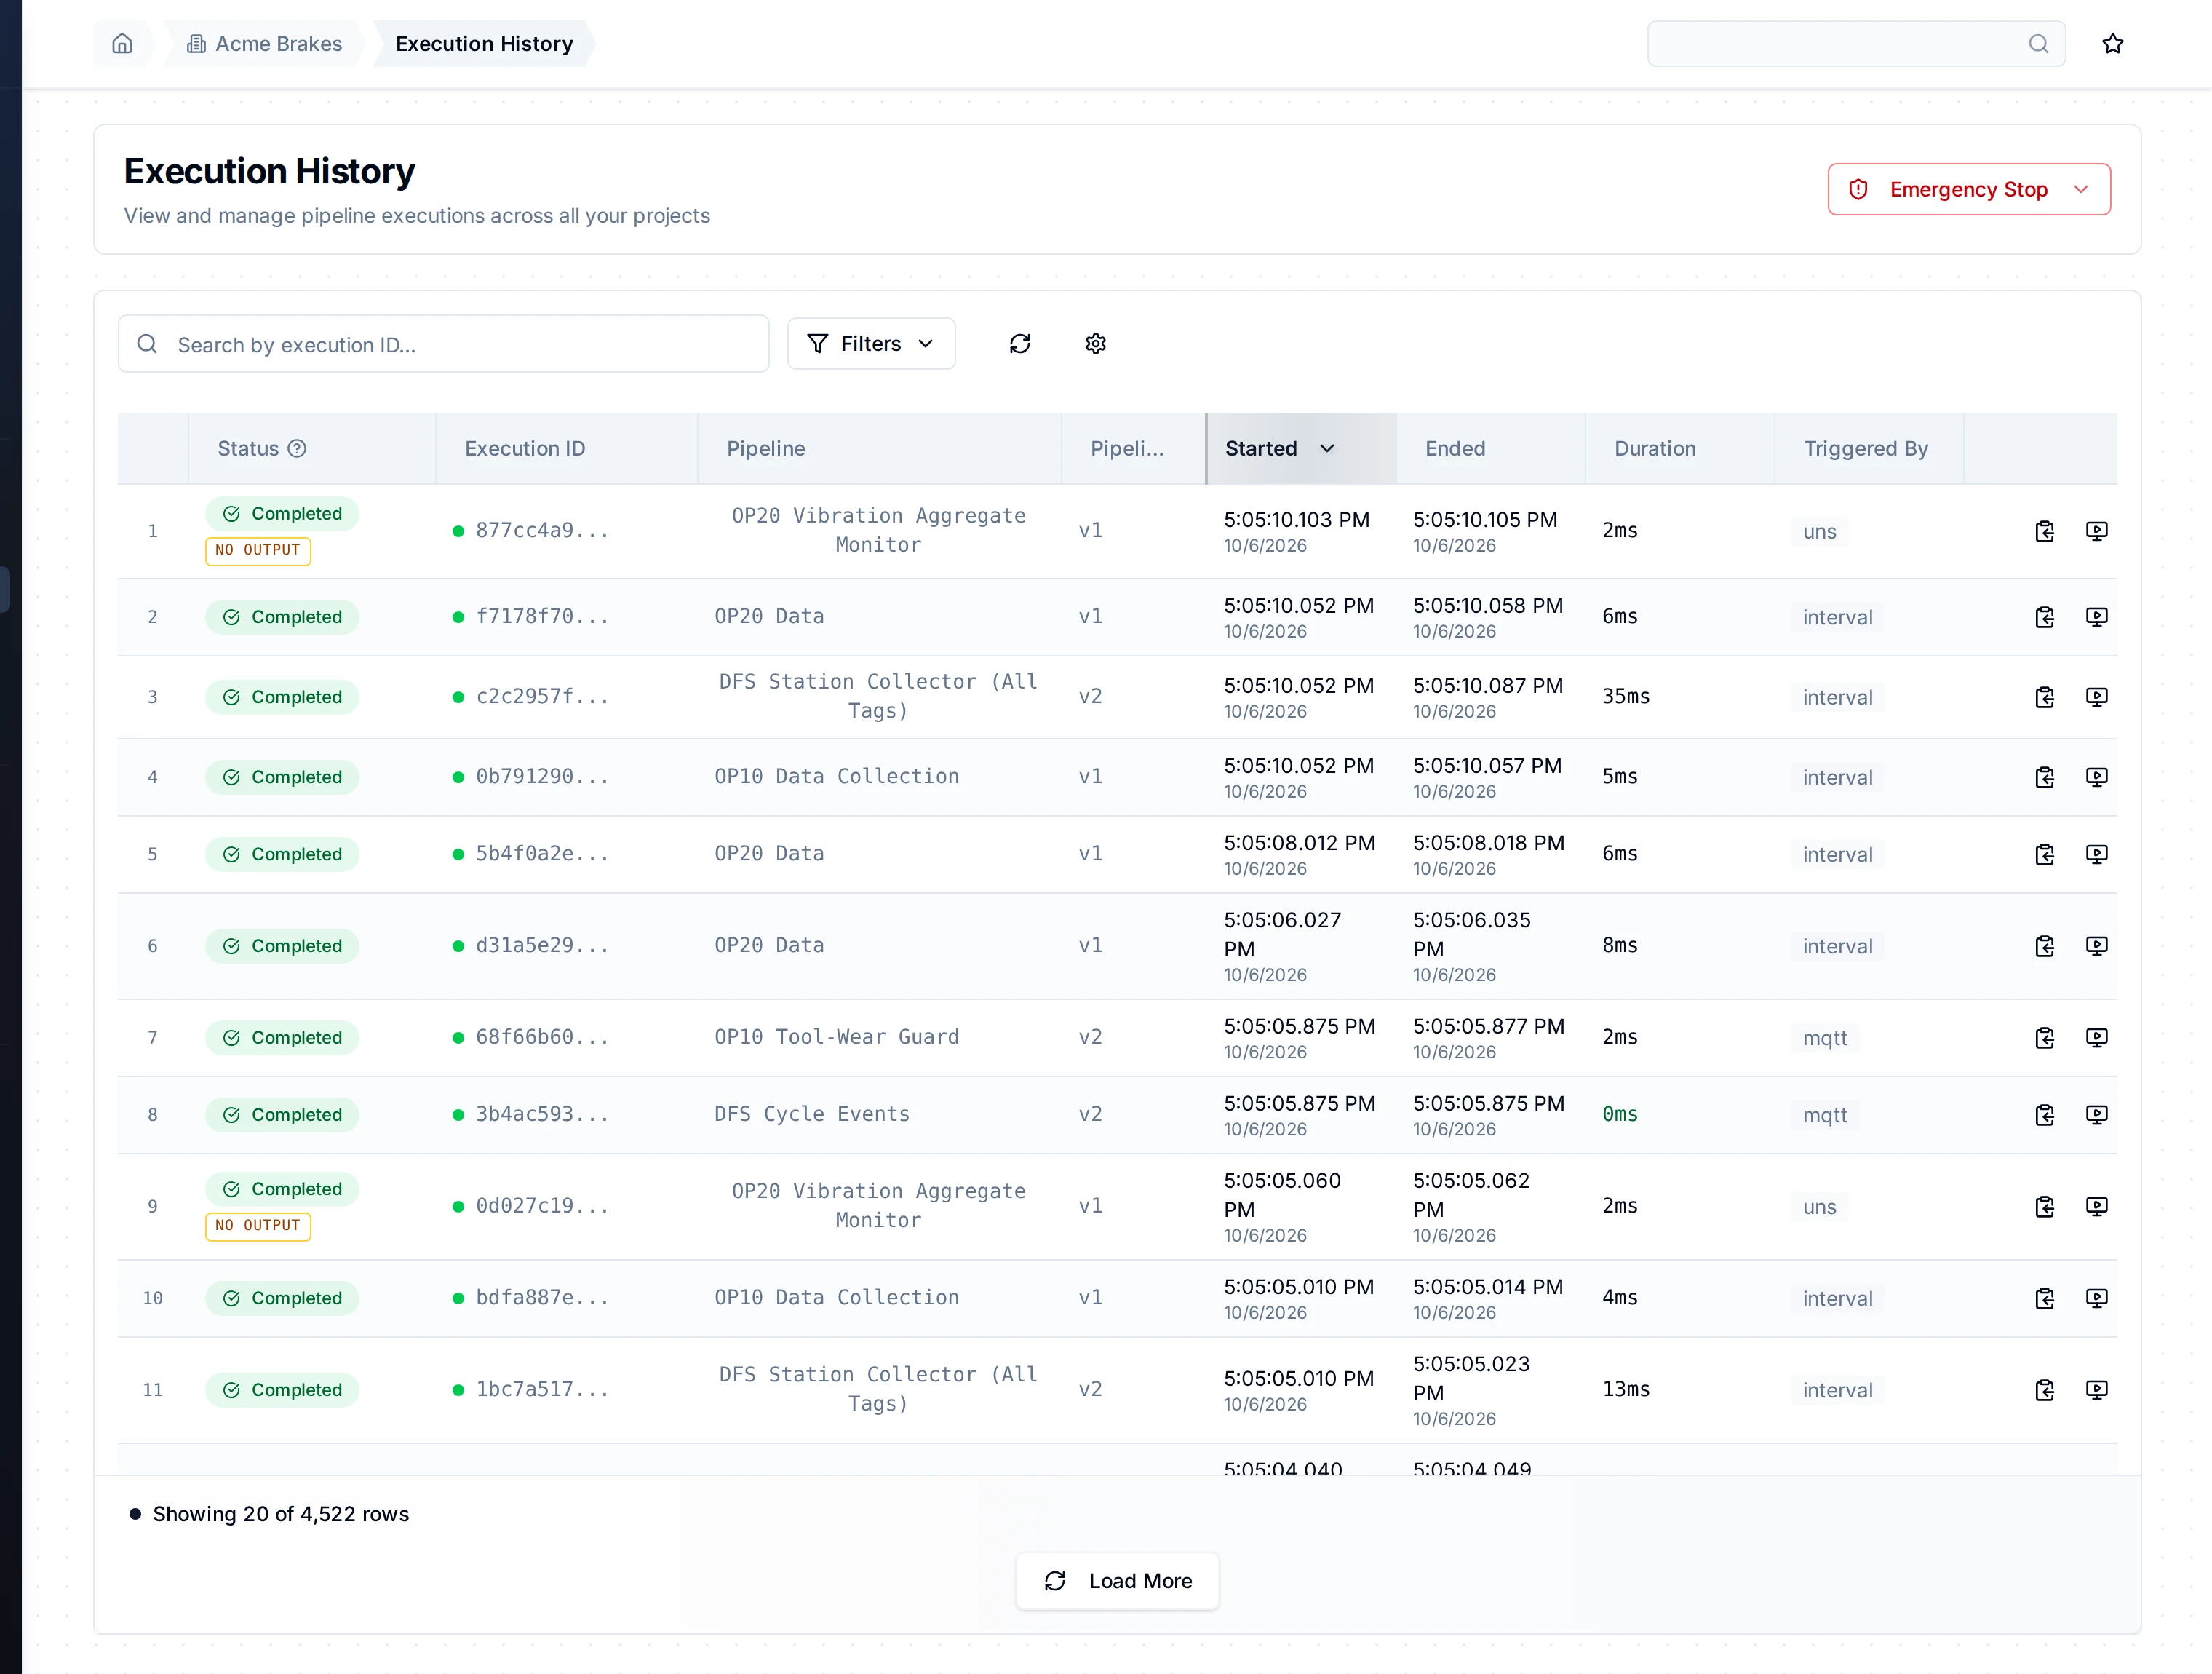
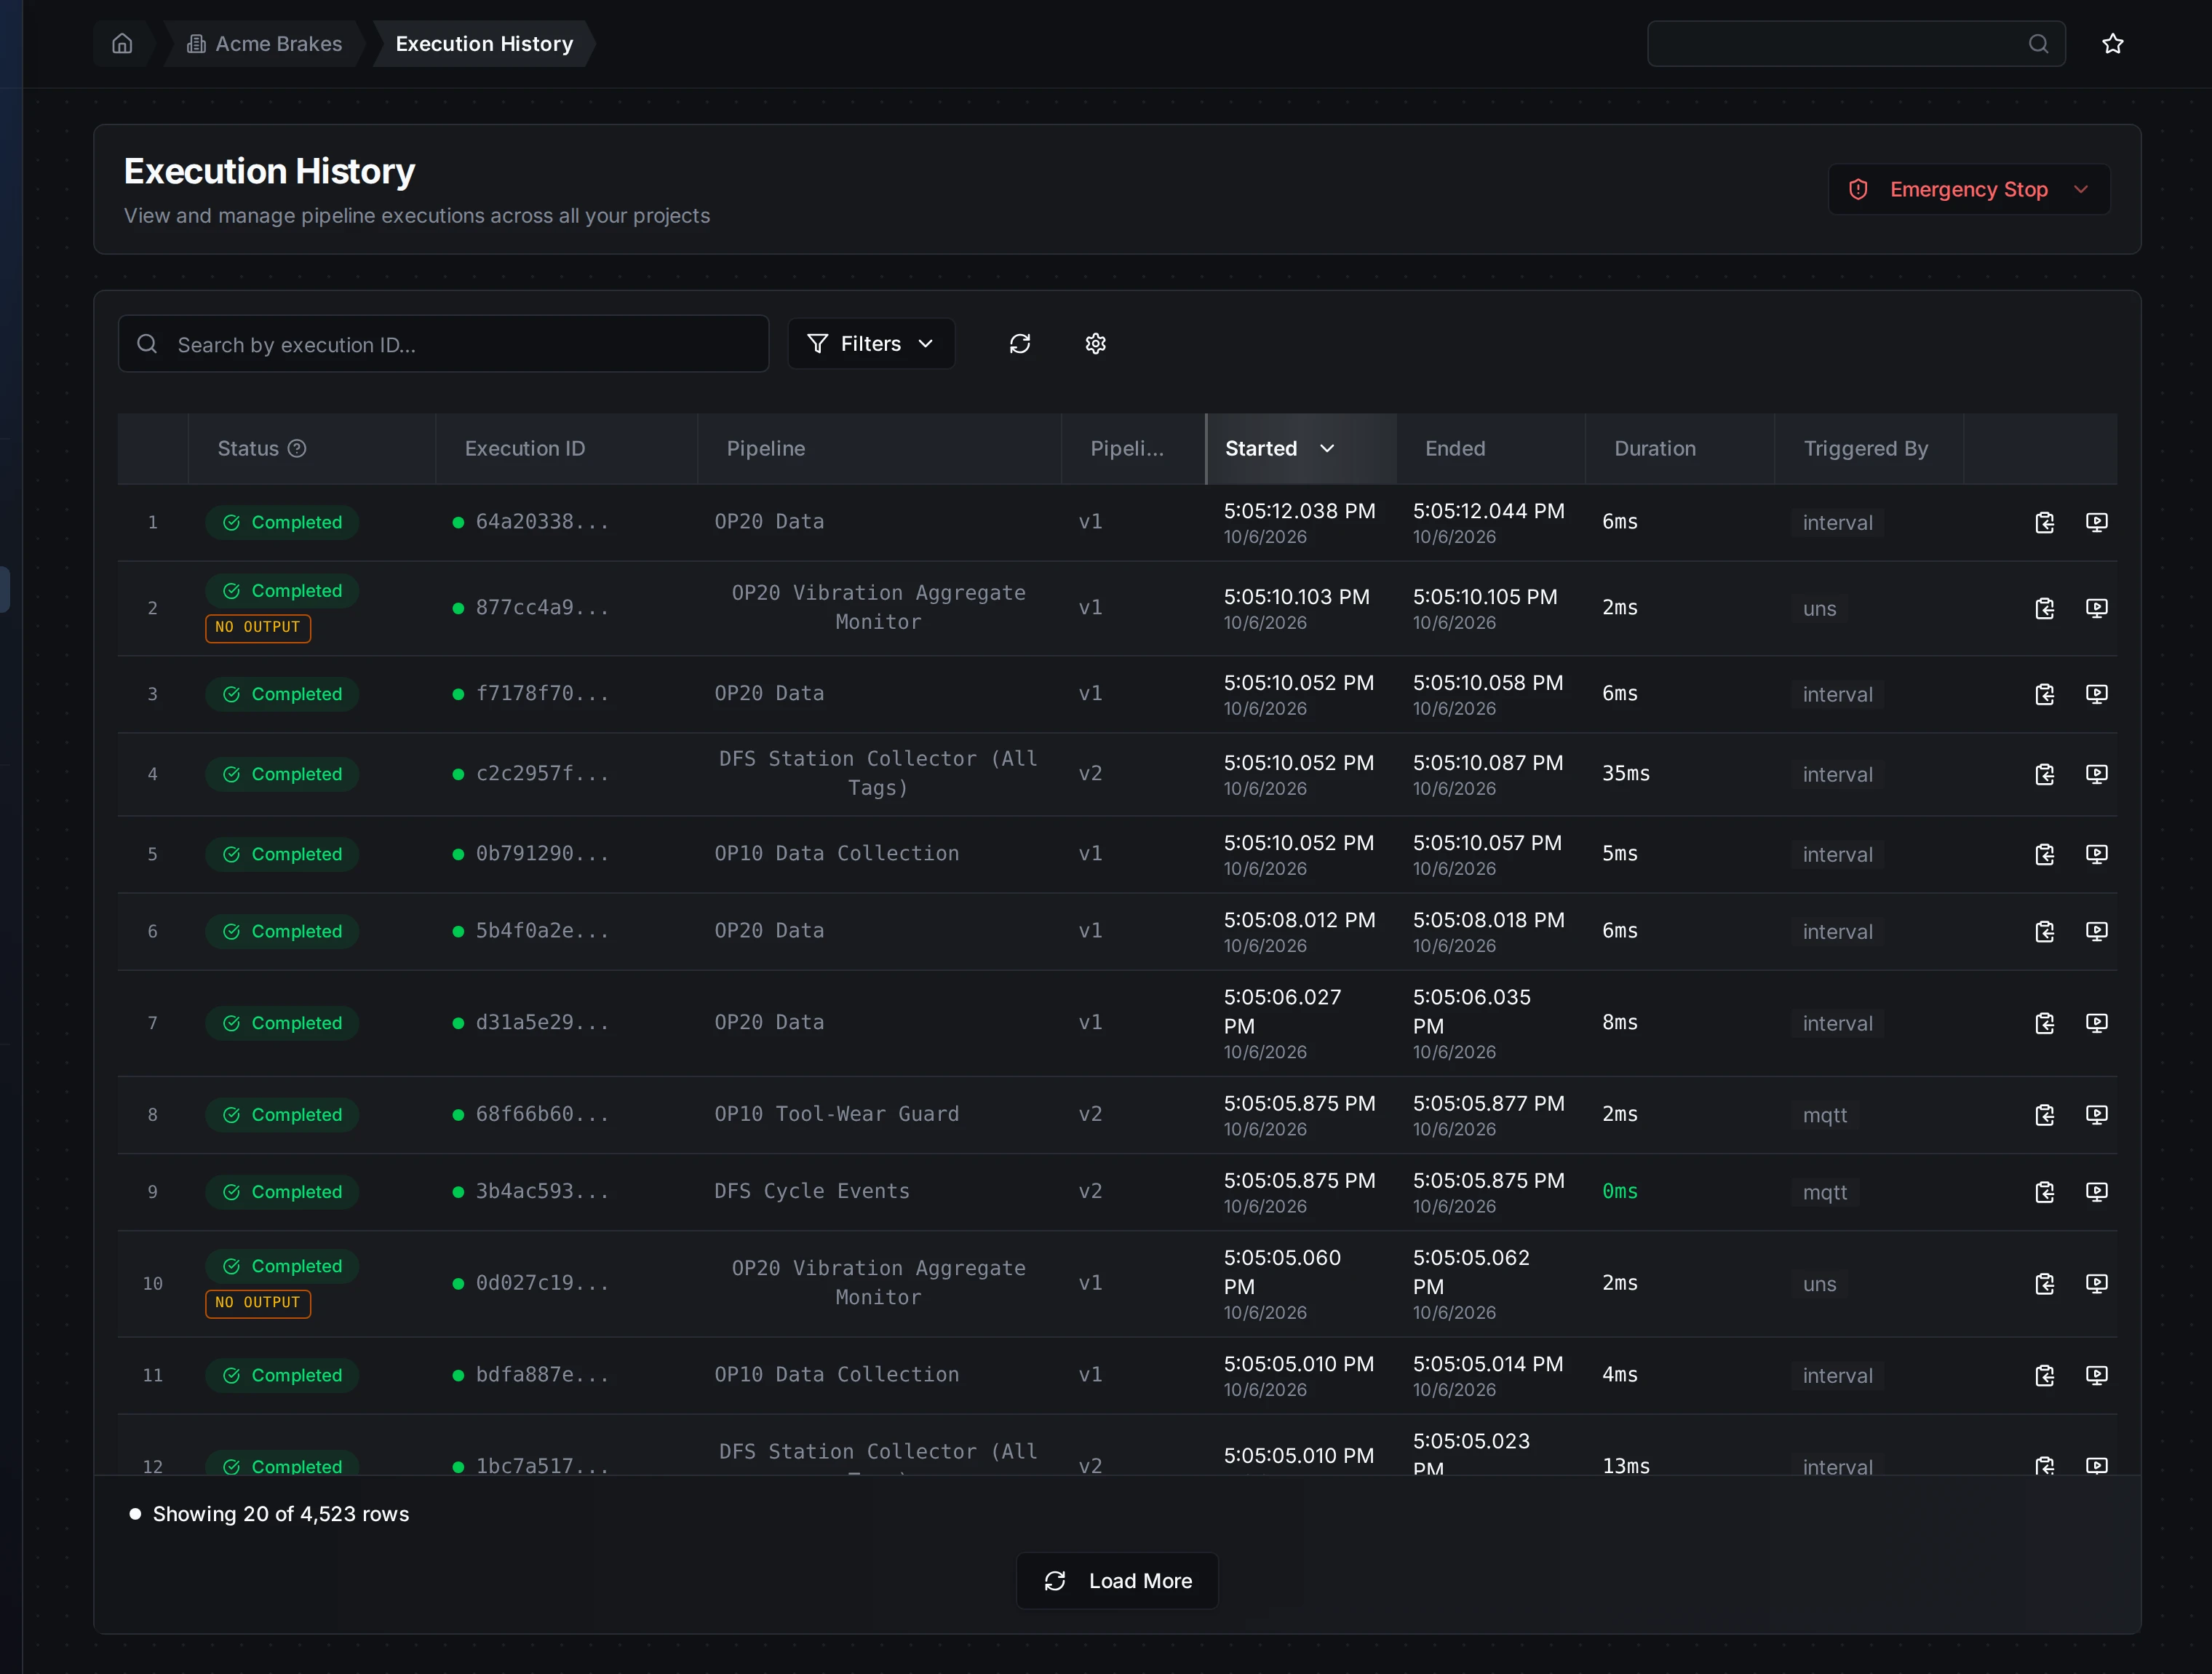
Execution History on the demo plant: every pipeline's recent runs with their status, timing and actions.
Table Columns
| Column | Description |
|---|---|
| Status | Color-coded badge: Completed, Completed with Errors, Failed, Running, Queued, or Cancelled. Completed with Errors means a node failed but the pipeline was set to continue; see Run status and On Error. A run whose every failed node failed because a validation rule rejected its value also wears Rejected by a validation rule: its status stays Failed (or Completed with Errors), as it is stored, but it is not a pipeline fault. The badge links to the Violations tab of Alerts, where the rejected values are listed. Runs that sent no output wear no output. |
| Execution ID | Unique UUID. Click to copy to clipboard. |
| Pipeline | Name of the pipeline that ran. Click to open it in the designer. |
| Pipeline Version | Which version of the pipeline was executed (e.g. v37). |
| Started | Timestamp when execution began. Sortable. |
| Ended | Timestamp when execution finished. Shows "Still running..." for active executions. Sortable. |
| Duration | Total execution time. Color-coded: green under 1 minute, orange over 1 minute. Sortable. |
| Triggered By | How the execution was started: Schedule, Manual, Webhook, or Event. |
Filters
Click Filters to expand the Advanced Filters panel.
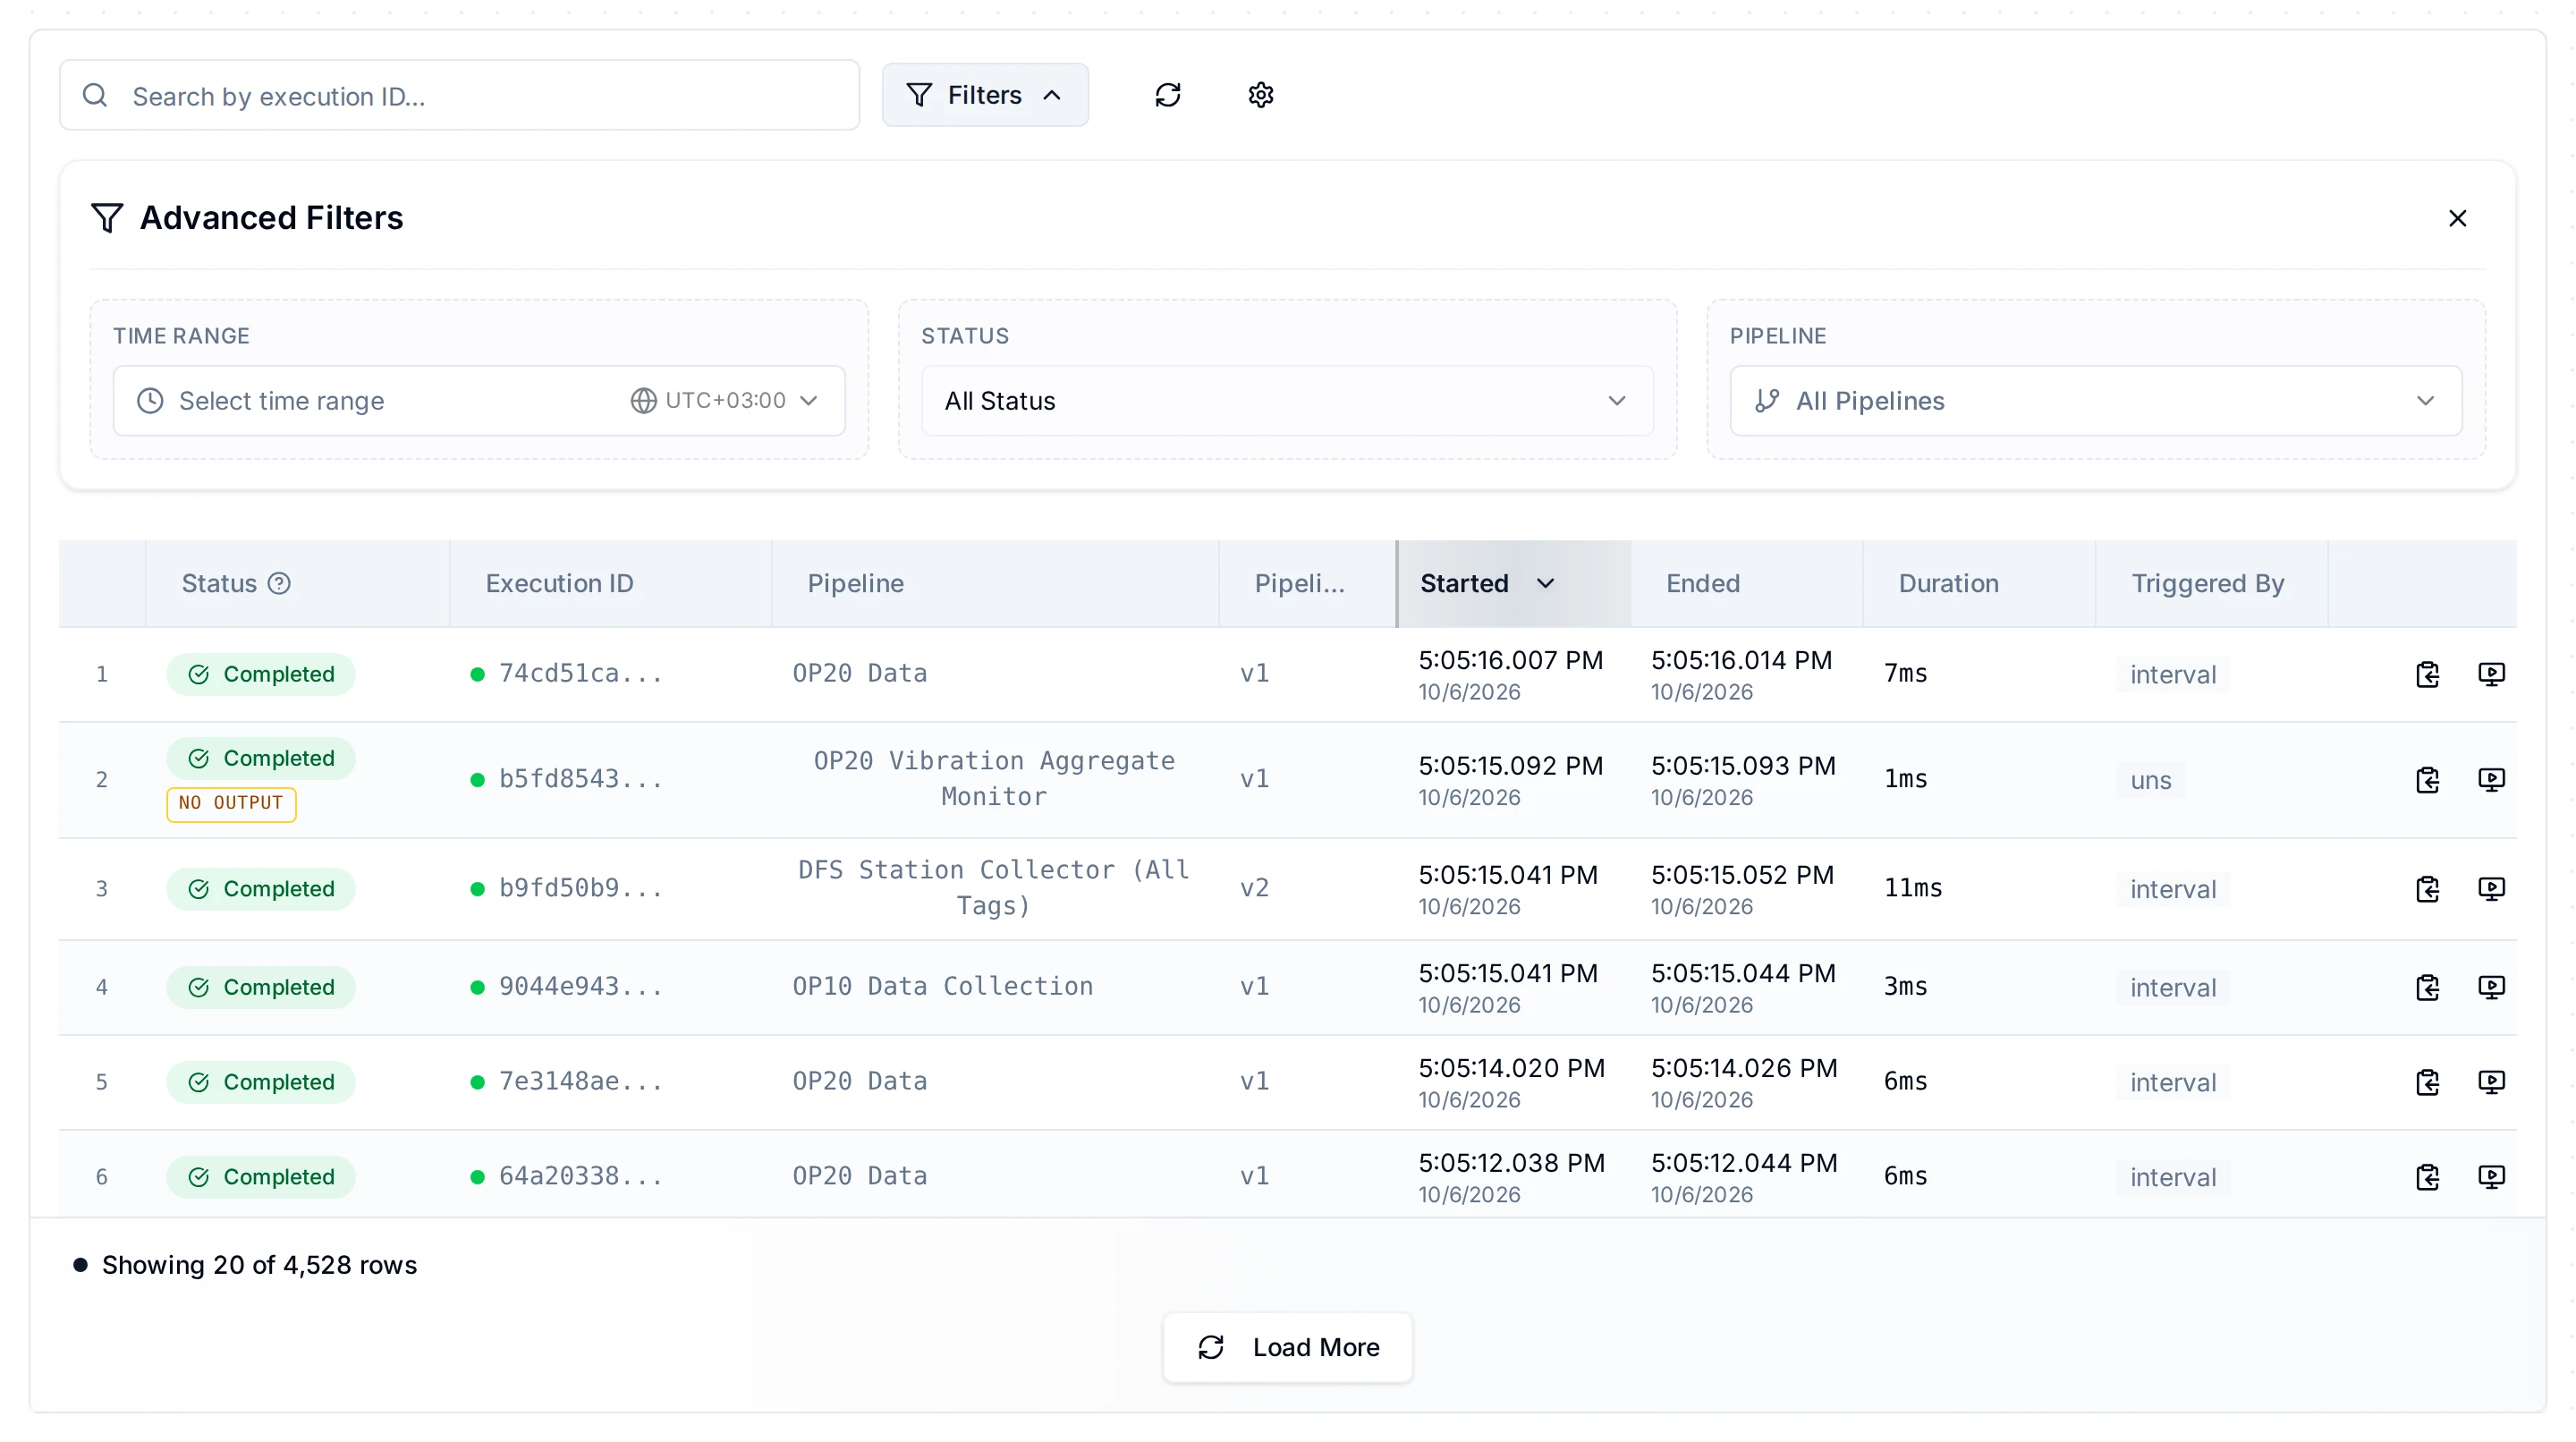
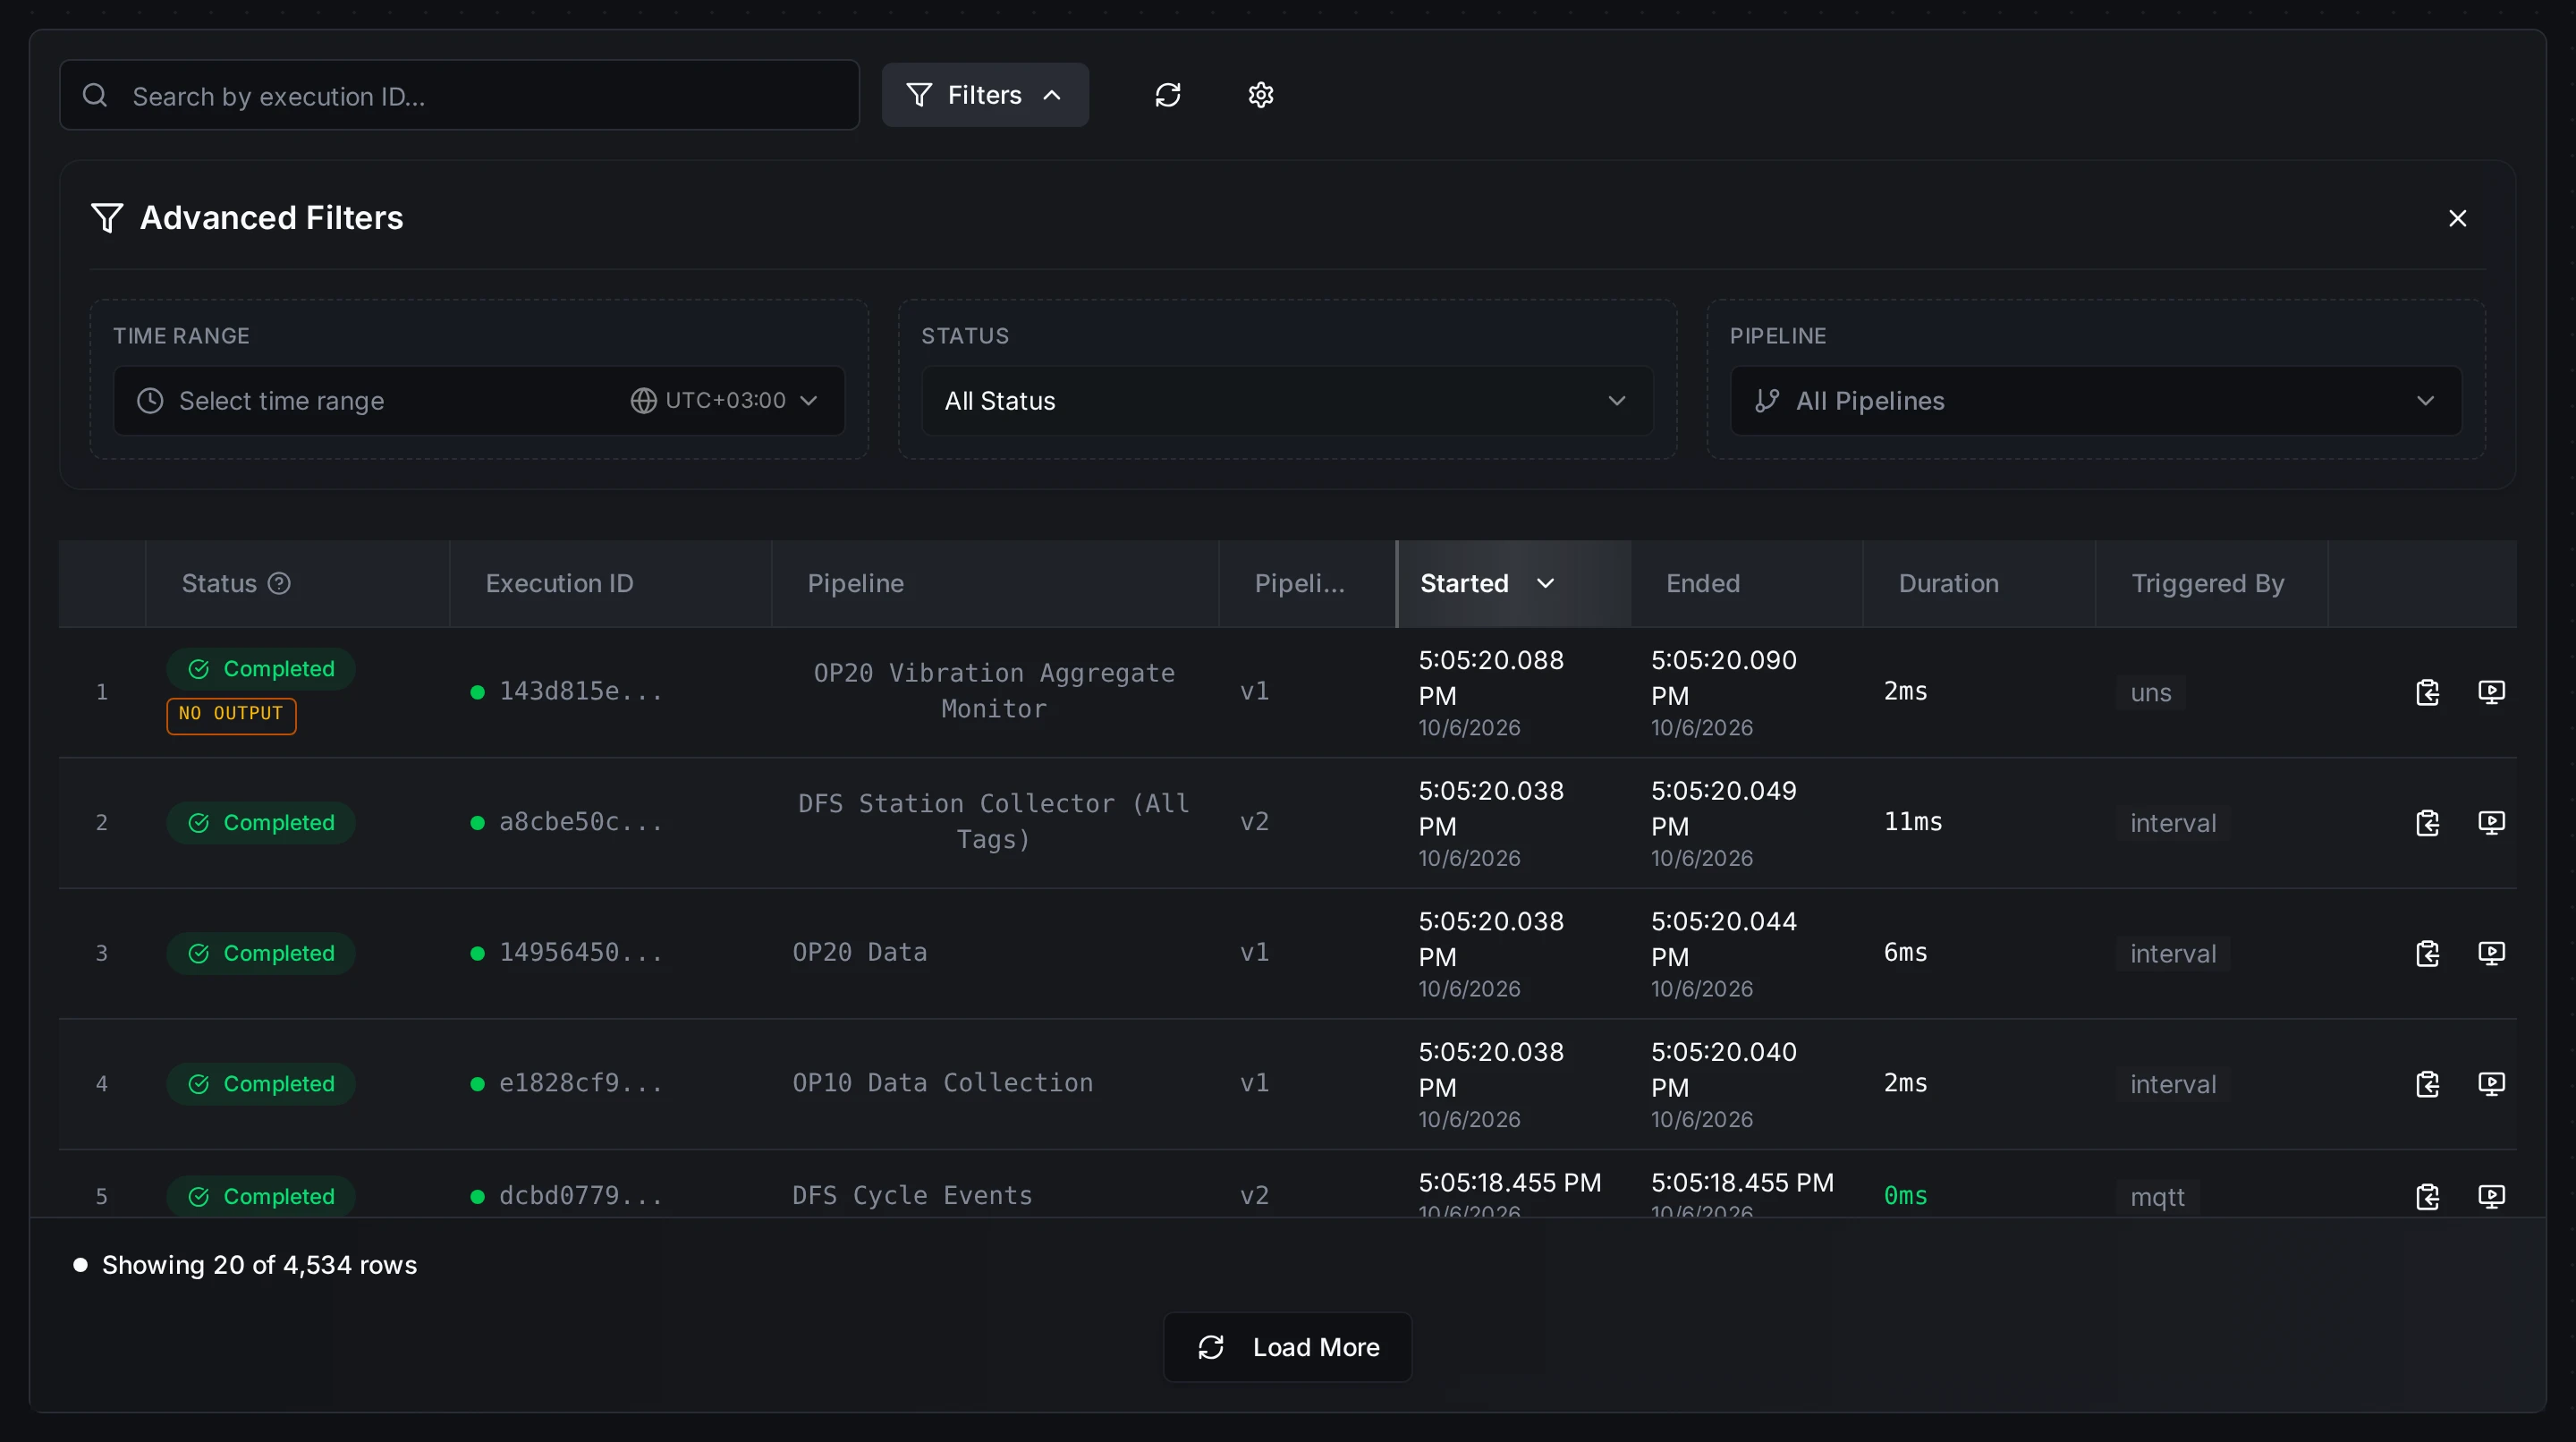
Advanced Filters: Time Range, Status, and Pipeline selectors.
| Filter | Description |
|---|---|
| Search | Search by execution ID with partial matching. |
| Time Range | Preset ranges (Last 1 hour, Last 24 hours, etc.) or custom date range with timezone support. |
| Status | Filter by status: All, Queued, Running, Completed, Completed with Errors, Failed, Failed or Completed with Errors, Cancelled. The combined option lists every run with a node failure. The Overview's Investigate failed runs card counts the same runs except those a validation rule rejected, and its link hides those too. |
| Pipeline | Filter by a specific pipeline or show all. |
All filter and sort states persist in the URL, so you can share links with pre-applied filters or bookmark commonly used views.
Two filters are set only by the links on the Overview, and each one shows above the table while it is on, with × to remove it:
| Filter | Shown as | Set by |
|---|---|---|
| Real failures only | Real failures only: runs rejected by a validation rule are hidden | Investigate failed runs and the failing pipelines of the Overview's warnings, which count only real failures |
| Silent runs | Silent runs only: no output dispatched | Investigate silent runs on the Overview's no output warning |
Actions
| Action | Available When | Description |
|---|---|---|
| View on Canvas | Completed, Completed with Errors, Failed, Cancelled | Opens the execution in Execution Replay mode on the Pipeline Designer. |
| Retry | Failed, Completed with Errors | Reruns the pipeline with the same inputs. Creates a new execution instance. |
| Cancel | Running | Gracefully stops the execution. Completed nodes are preserved. |
Emergency Stop
The Emergency Stop button in the Execution History header stops pipelines for the whole workspace, not only one pipeline. It is shown only to users with the workspace:emergency_recovery permission. It offers two actions:
| Action | What it does |
|---|---|
| Stop pending pipelines | Removes every pipeline run that is waiting to start. Runs that are already running continue. The dialog shows how many runs are waiting. |
| Stop running pipelines | Sends a stop signal to every running pipeline. Each one stops at its next safe point, which can take a moment for slow steps. Work a run has already done (database writes, message publishes, API calls) is not undone. |
Both actions open a confirmation dialog that asks for a Reason (recorded for audit) and for the workspace name, typed exactly. Confirm stays disabled until both are filled in. Neither action can be undone.
Stopping running pipelines does not stop new runs from starting. To stop those too, turn on maintenance mode from the workspace Overview; it also suspends the workspace's connections.
Pagination
The table loads 20 executions by default. Click Load More at the bottom to fetch additional entries. Running and queued executions auto-refresh every 5 seconds.
Execution Replay
Select an execution from the History sidebar or click View on Canvas from the Execution History table to enter Execution Replay mode. This overlays the historical execution results onto the pipeline canvas so you can visually inspect what happened at each node.
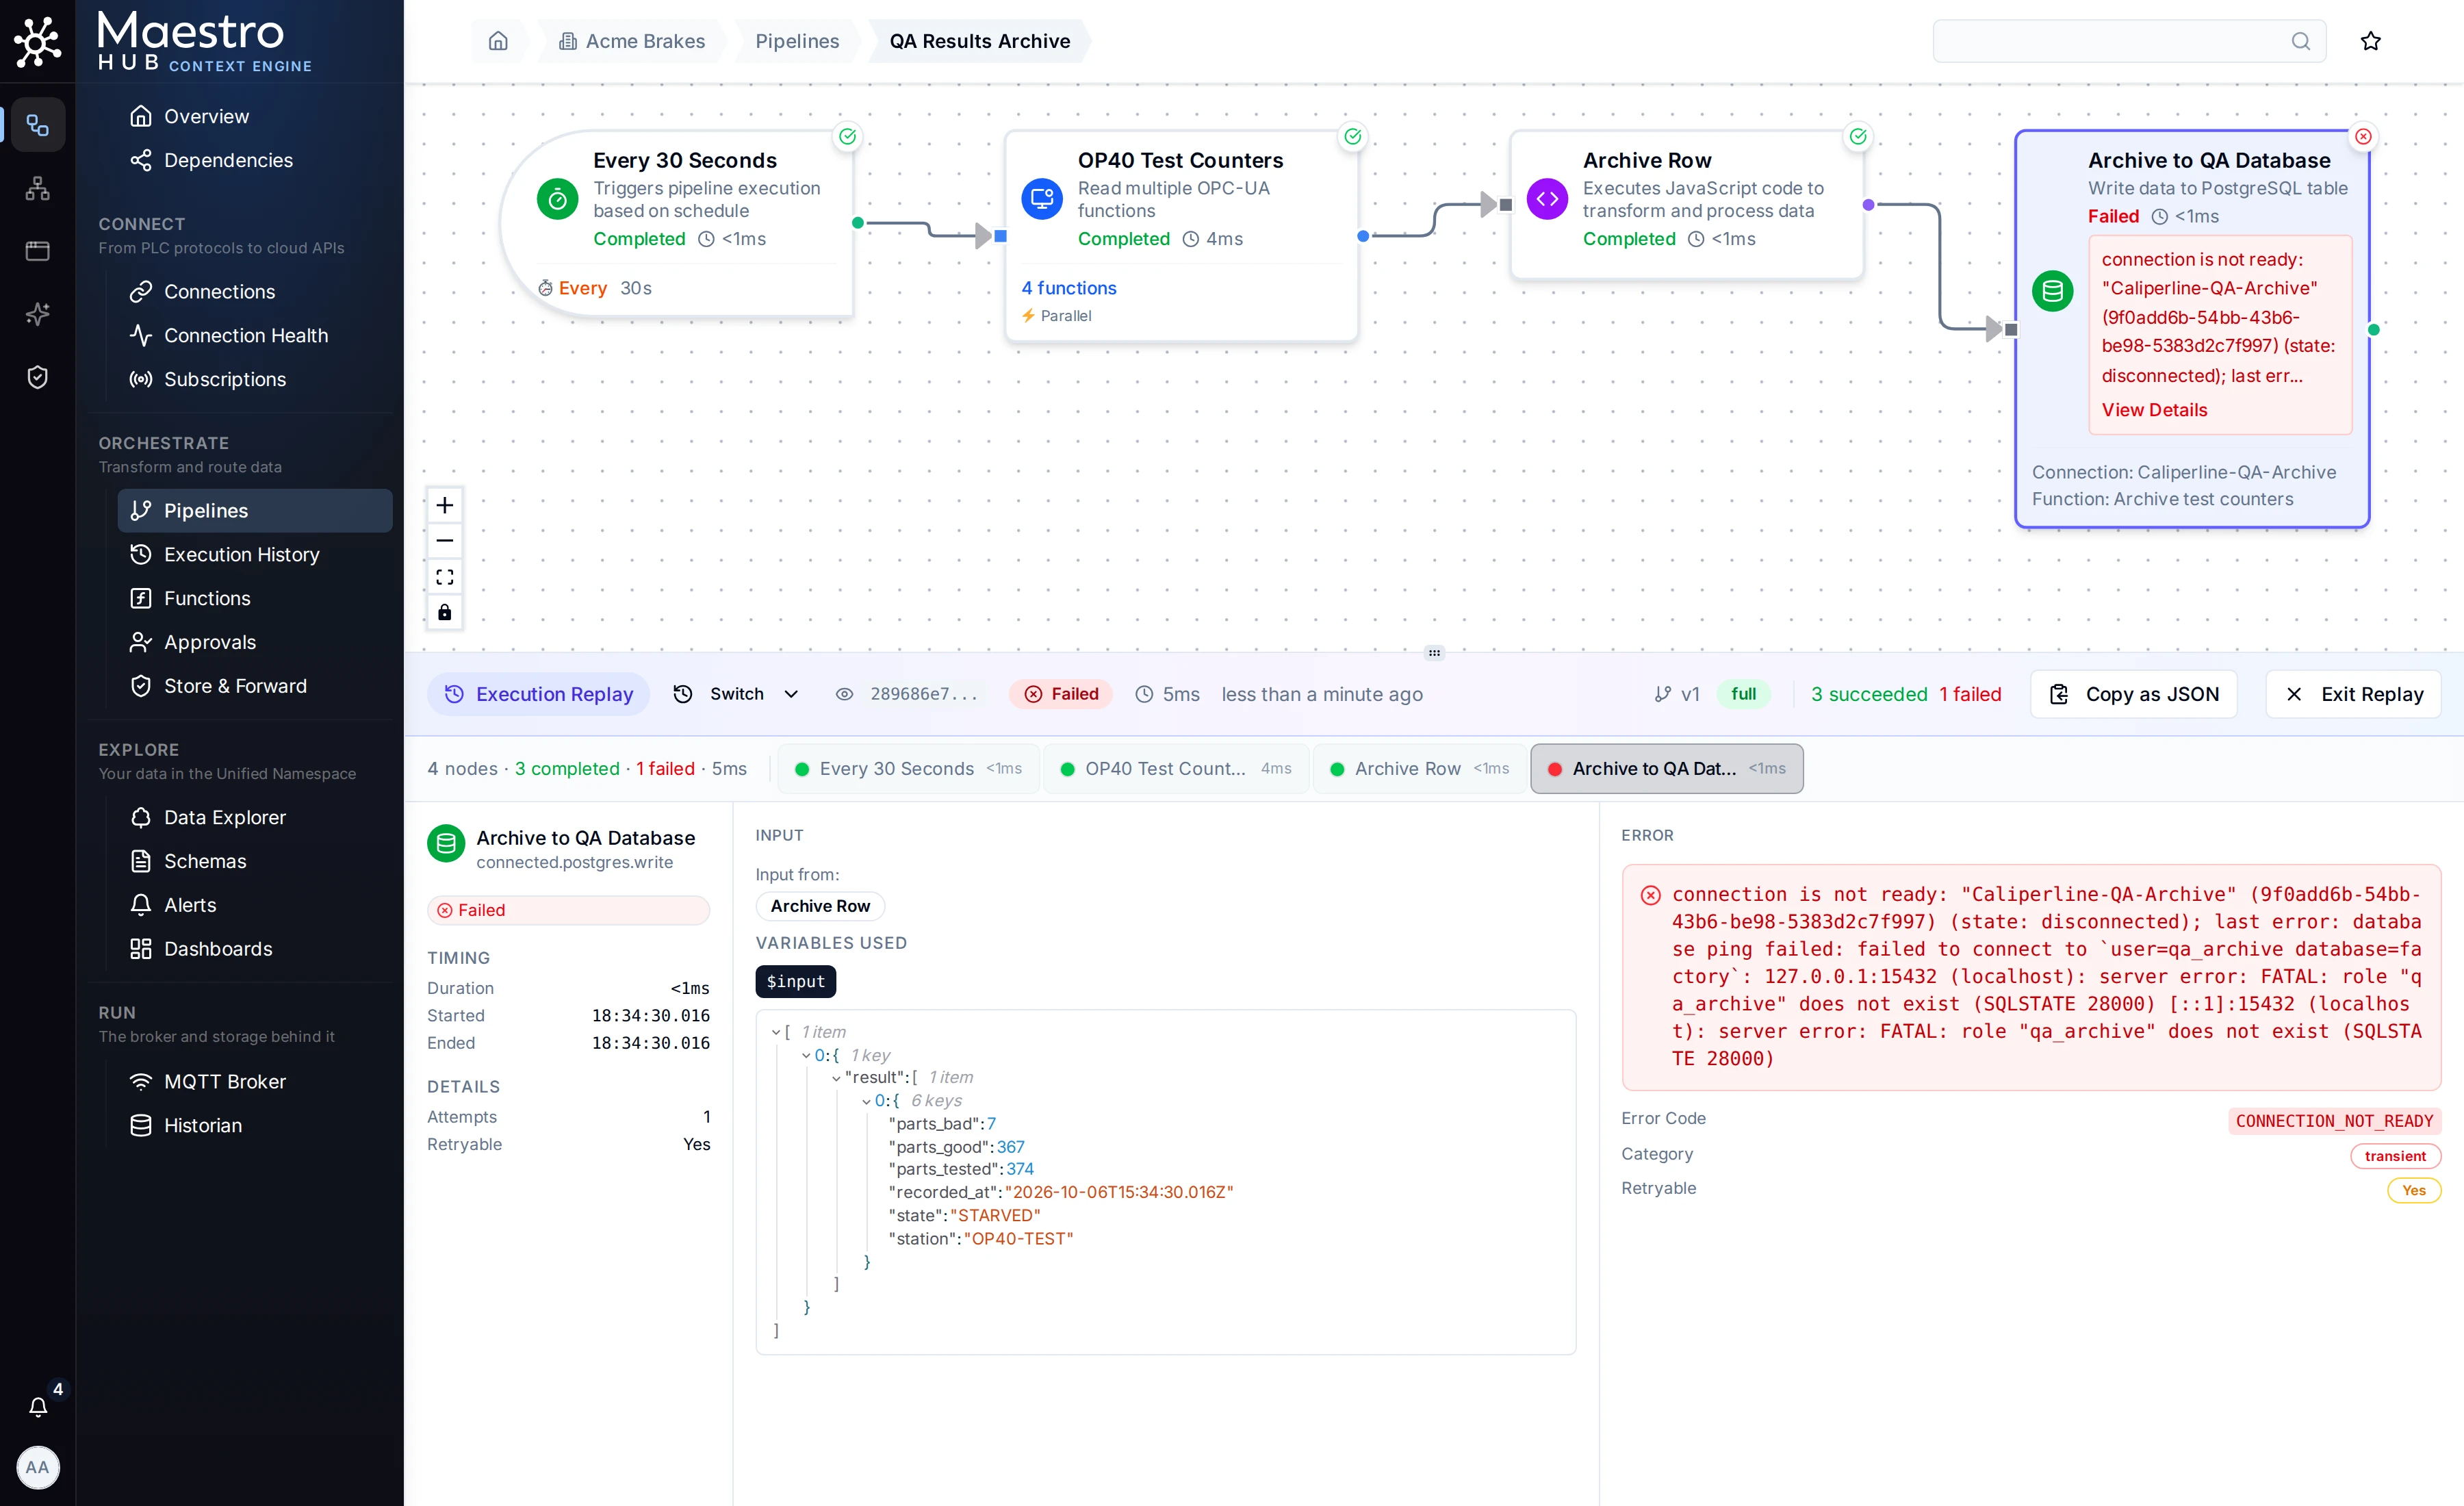
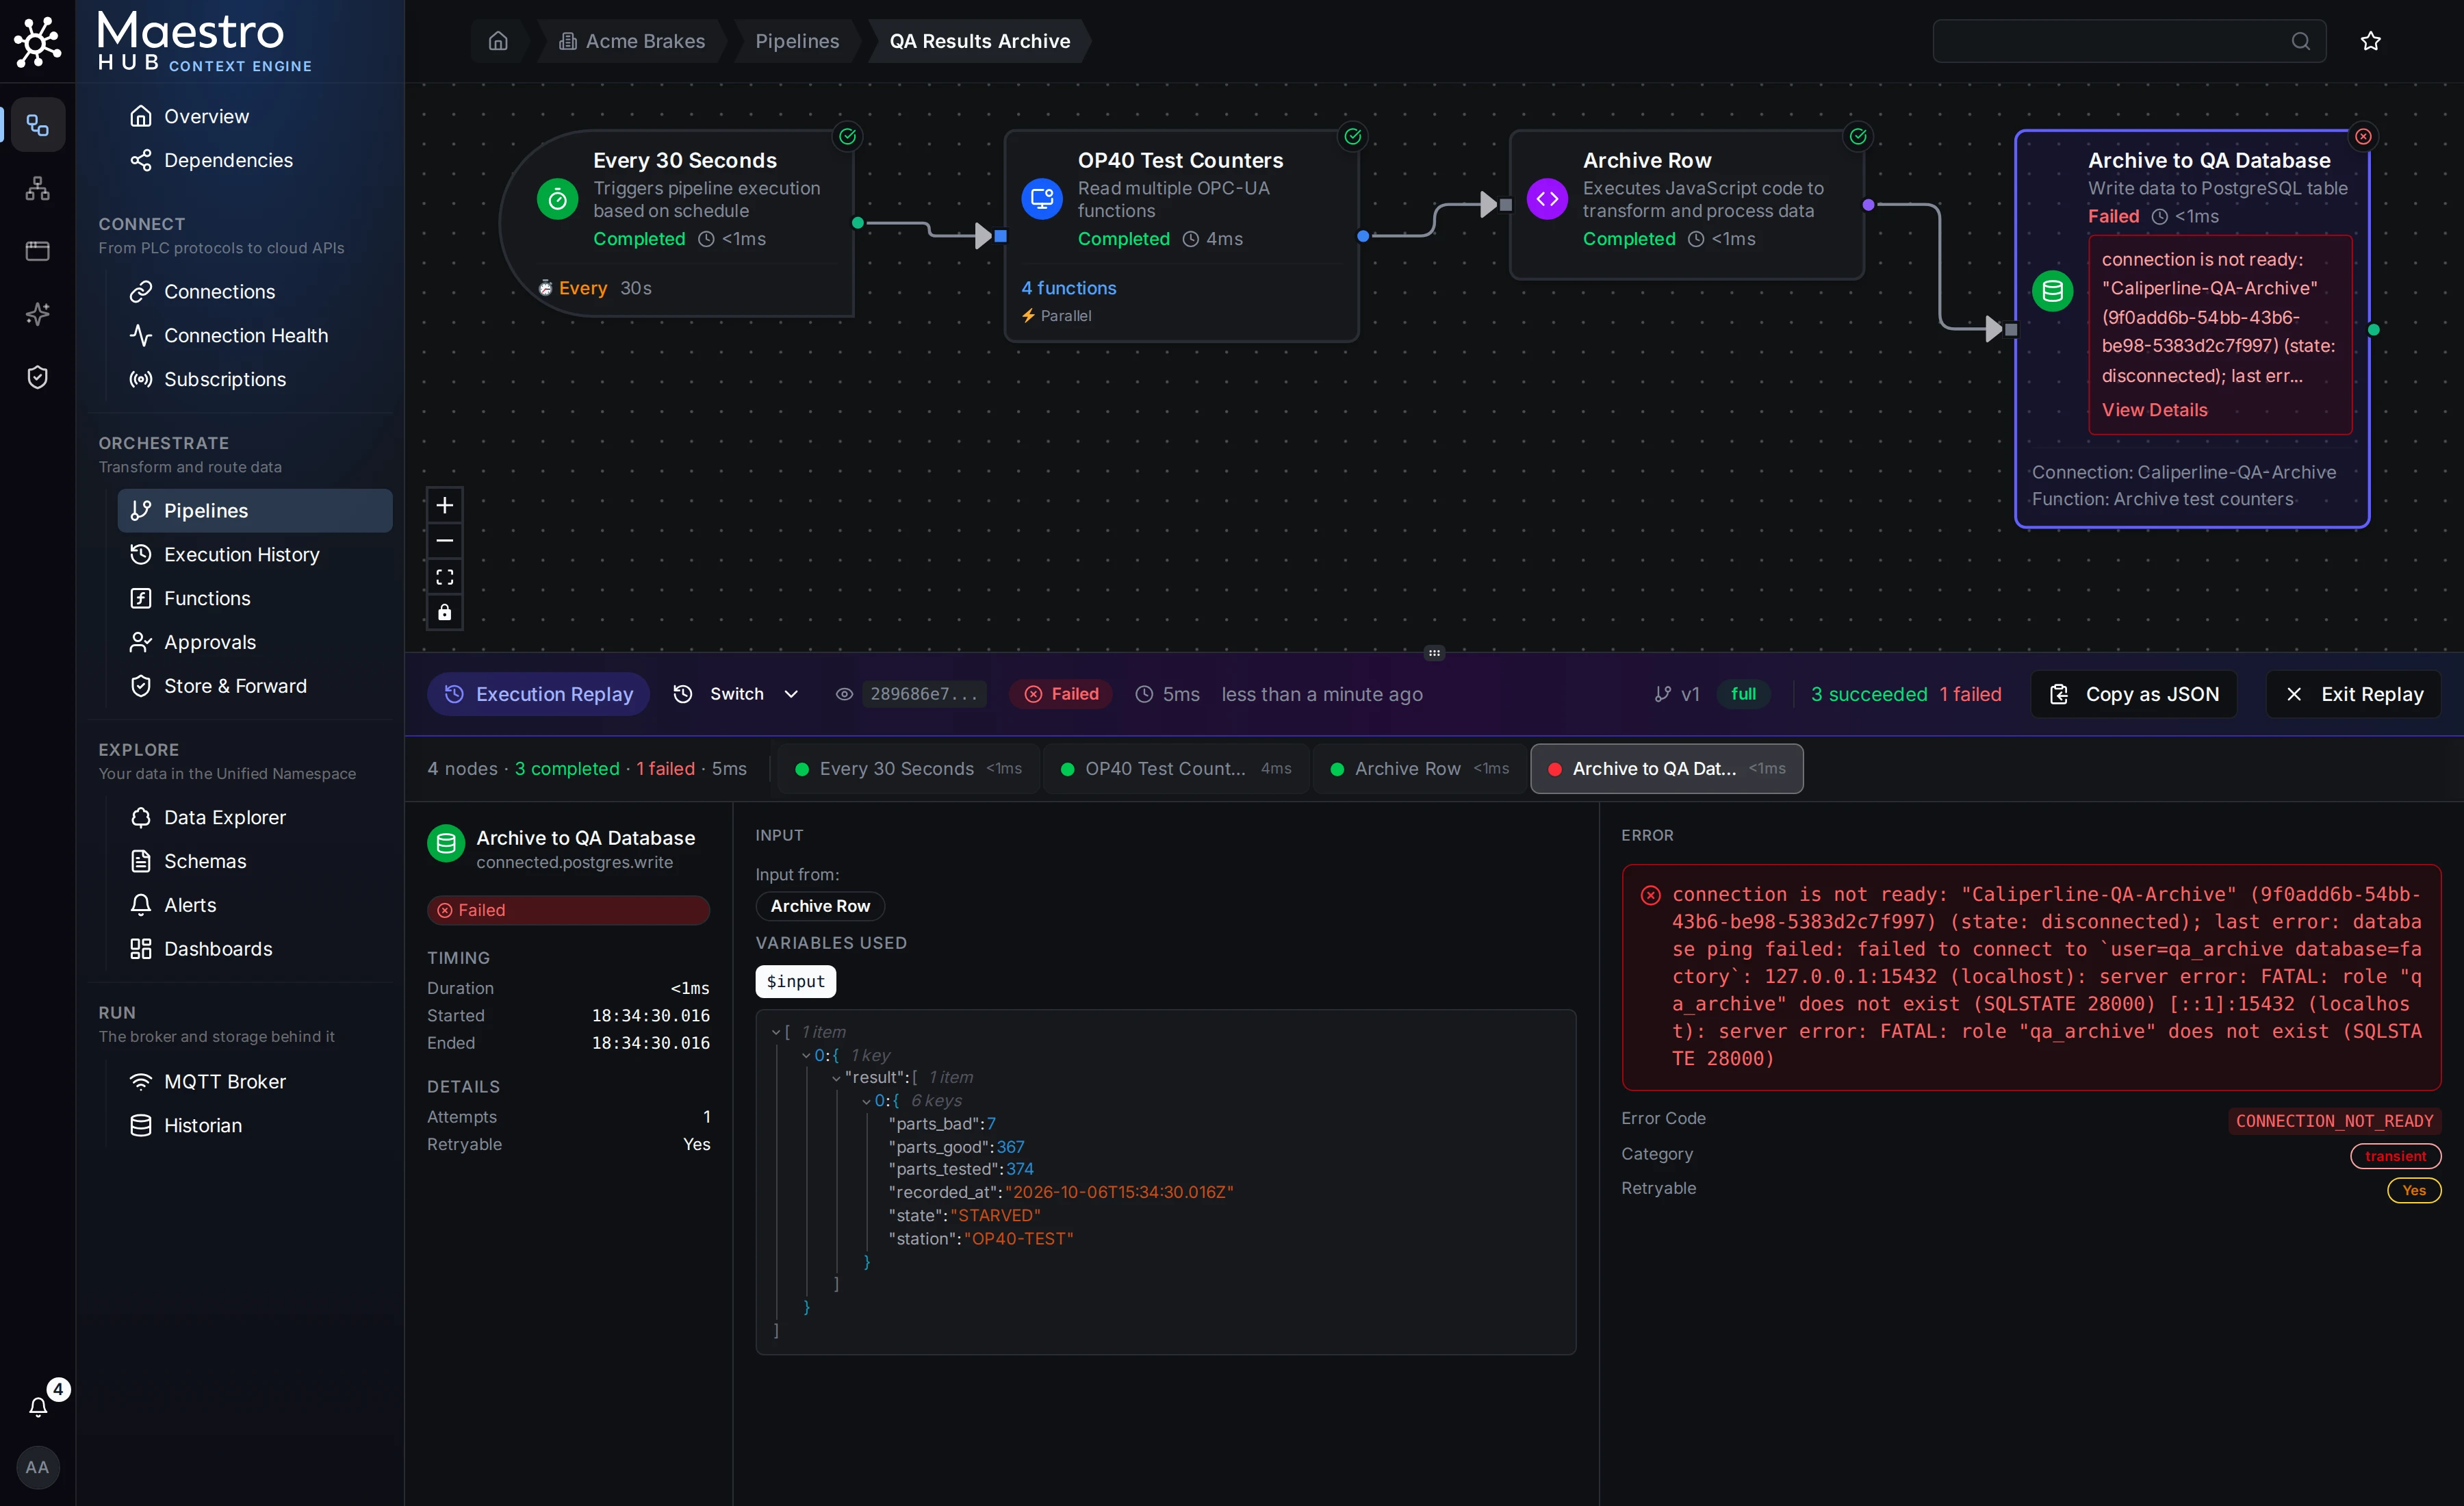
Execution Replay: each node's result on the canvas, and the run's details in the panel below
The panel below the canvas has a header with the run's ID, status, duration, version and detail level (with Switch, Copy as JSON and Exit Replay), a tab for every node that ran, and three columns for the selected node: its status and timing, the input it received, and the output or error it produced. What a run keeps depends on its Execution History Detail: input and output data are kept only at Full. For a node inside a For-Each loop, see Watching a Loop Run. Monitor and troubleshoot › Execution Replay describes every part of the panel.
Shareable URL: when you enter Replay mode, the URL updates with ?execution={id}. Share this URL and the recipient will open the same execution directly in Replay mode.
Pipeline Metrics
Choose ⋯ More actions → Metrics in the Pipeline Designer toolbar to open a metrics panel showing real-time performance statistics for the current pipeline. The panel auto-refreshes every 5 seconds.
| Metric | Description |
|---|---|
| Run outcome (24h) | A bar and a line splitting the runs into clean, completed with errors, and failed, for example 60% clean · 30% with errors · 10% failed. |
| Clean / With errors / Failed | Counts of runs that completed cleanly, completed with errors, and failed. |
| Runs (24h) | Number of executions. |
| Avg Time | Average execution duration. |
The numbers cover the last 24 hours, the same window execution history keeps by default, so a failure that has left the history has also left these numbers. They count every run, including the ones execution history did not record. The pipelines list shows the same numbers in its Health column.
Skip Timeline
Choose ⋯ More actions → Timeline in the Pipeline Designer toolbar to see the trigger fires this pipeline dropped without running in the last 5 minutes. Each skipped fire is a tick on an amber lane; hover over a tick for its time and reason. When there are too many to draw one by one, the lane shows them as a density band instead. The panel refreshes every 3 seconds, and the refresh button reloads it at once.
The header shows the number of skips in the window (total), the rate (per min), the most common reason (primary), and the total number of skips the engine has recorded for this pipeline since it last started (lifetime).
| Reason | Meaning |
|---|---|
| body too slow for cadence | A schedule fire was dropped because earlier runs were still occupying the pipeline. The pipeline takes longer than its schedule interval. |
| pipeline disabled | The pipeline was disabled when the trigger fired. |
| workspace maintenance | The workspace was in maintenance mode, which drops every trigger fire. |
| dispatcher disabled | Trigger dispatching is turned off for the whole deployment (for example, when the license has expired). |
| pipeline not found | The trigger fired for a pipeline that could not be found (for example, one that was deleted). |
When nothing was skipped, the panel says so.
Skipped fires in the pipelines list
The pipelines list shows the same skips across every pipeline. In the Health column, a pipeline that skipped trigger fires carries an amber badge with the count, for example 42 skipped/24h: the trigger fired 42 times in the last 24 hours and the pipeline did not run for those fires. Hover over the badge to read why fires are skipped (the reasons are the ones in the table above).
Click the badge to list only the pipelines that skipped. You can also pick the filter yourself: open the filters and choose Skipped trigger fires, then Skipped in the last hour, Skipped in the last 24 hours or Skipped in the last 7 days. While the filter is on, the badges count over the window you chose. Choose Any pipeline, or clear the filters, to see every pipeline again.
The engine keeps skips for 7 days, so the longest window is 7 days. With several engine replicas on PostgreSQL, the count and the filter cover the skips of every replica.