From Industrial Protocols to Production Intelligence
in 15 Minutes
See what your factory has been hiding from you.
Install MaestroHub, connect to a simulated factory, and build your first data pipeline.
1. Install MaestroHub
MaestroHub runs as a single binary or Docker container. No external databases, no message brokers — everything is embedded.
- Binary (Recommended)
- Docker
- Docker Compose
Download from the MaestroHub Portal and run:
- Windows
- macOS
- Linux (AMD64)
- Linux (ARM64)
- Download the ZIP file and extract it
After extraction, you'll see the following structure:
maestrohub-lite/
├── README.txt
├── ThirdPartyNotices.txt
├── starter.bat
├── maestrohub-lite.exe
├── admin-cli.exe
└── config.yaml
- Double-click
starter.bat(or runmaestrohub-lite.exedirectly)
tar -xzf maestrohub-lite_*_darwin_arm64.tar.gz
cd maestrohub-lite
./maestrohub-lite
After extraction, you'll see the following structure:
maestrohub-lite/
├── README.txt
├── ThirdPartyNotices.txt
├── starter.bat
├── maestrohub-lite.exe
├── admin-cli.exe
└── config.yaml
If macOS blocks the app with a message that it "cannot be opened because it is from an unidentified developer," you need to allow it in your security settings:
- Go to System Settings (or System Preferences on older macOS) > Privacy & Security
- Scroll down to the Security section
- You'll see a message that MaestroHub Lite was blocked
- Click Open Anyway and confirm
For more information, see Apple's guide on opening apps from unidentified developers.
tar -xzf maestrohub-lite_*_linux_amd64.tar.gz
cd maestrohub-lite_*_linux_amd64
./maestrohub-lite
After extraction, you'll see the following structure:
maestrohub-lite/
├── README.txt
├── ThirdPartyNotices.txt
├── starter.bat
├── maestrohub-lite.exe
├── admin-cli.exe
└── config.yaml
tar -xzf maestrohub-lite_*_linux_arm64.tar.gz
cd maestrohub-lite_*_linux_arm64
./maestrohub-lite
After extraction, you'll see the following structure:
maestrohub-lite/
├── README.txt
├── ThirdPartyNotices.txt
├── starter.bat
├── maestrohub-lite.exe
├── admin-cli.exe
└── config.yaml
For Raspberry Pi 4/5, AWS Graviton, Ampere, or Apple Silicon running Linux.
The browser opens automatically at http://localhost:6163.
Download the Docker image for your architecture from the MaestroHub Portal.
- AMD64 (Intel/AMD)
- ARM64 (Apple Silicon)
Download: maestrohub-lite_*_docker_amd64.zip
After extracting:
maestrohub-lite-amd/
├── ThirdPartyNotices.txt
└── maestrohub-lite-amd64.tar.gz
Load the image into Docker:
docker load -i maestrohub-lite-amd/maestrohub-lite-amd64.tar.gz
Create a volume for persistent data:
docker volume create maestrohub-data
Run the container:
docker run -d \
  --name maestrohub \
  -p 8080:8080 \
  -p 1883:1883 \
  -p 8083:8083 \
  -v maestrohub-data:/data \
  maestrohub/lite:2.3.0
Download: maestrohub-lite_*_docker_arm64.zip
After extracting:
maestrohub-lite-arm/
├── ThirdPartyNotices.txt
└── maestrohub-lite-arm64.tar.gz
Load the image into Docker:
docker load -i maestrohub-lite-arm/maestrohub-lite-arm64.tar.gz
Create a volume for persistent data:
docker volume create maestrohub-data
Run the container:
docker run -d \
  --name maestrohub \
  -p 8080:8080 \
  -p 1883:1883 \
  -p 8083:8083 \
  -v maestrohub-data:/data \
  maestrohub/lite:2.3.0
Open http://localhost:8080 in your browser.
All commands above are written for Bash. Choose your preferred shell:
- Git Bash (Git for Windows) — run commands as-is
 PowerShell — replace
 \with`(backtick) and$(pwd)with${PWD}
Or use the Docker Compose tab for a shell-agnostic alternative.
| Port | Description |
|---|---|
| 8080 | Web UI + REST API |
| 1883 | MQTT broker |
| 8083 | MQTT over WebSocket |
First, load the image (if not already loaded):
# AMD64 (Intel/AMD)
docker load -i maestrohub-lite-amd/maestrohub-lite-amd64.tar.gz

# Or ARM64 (Apple Silicon)
docker load -i maestrohub-lite-arm/maestrohub-lite-arm64.tar.gz
Save the following as docker-compose.yml:
services:
  maestrohub:
    image: maestrohub/lite:2.3.0
    container_name: maestrohub
    restart: unless-stopped
    ports:
      - "8080:8080"   # Web UI + REST API
      - "1883:1883"   # MQTT broker
      - "8083:8083"   # MQTT over WebSocket
    volumes:
      - maestrohub-data:/data
    # environment:
    #   - TZ=Europe/Istanbul

volumes:
  maestrohub-data:
Then run:
docker compose up -d
Open http://localhost:8080 in your browser.
Works identically on Bash, PowerShell, and Cmd — no shell syntax differences.
| Port | Description |
|---|---|
| 8080 | Web UI + REST API |
| 1883 | MQTT broker |
| 8083 | MQTT over WebSocket |
2. Create Your Admin Account
On first launch, you will see the account creation screen. Enter your name, email, and password.
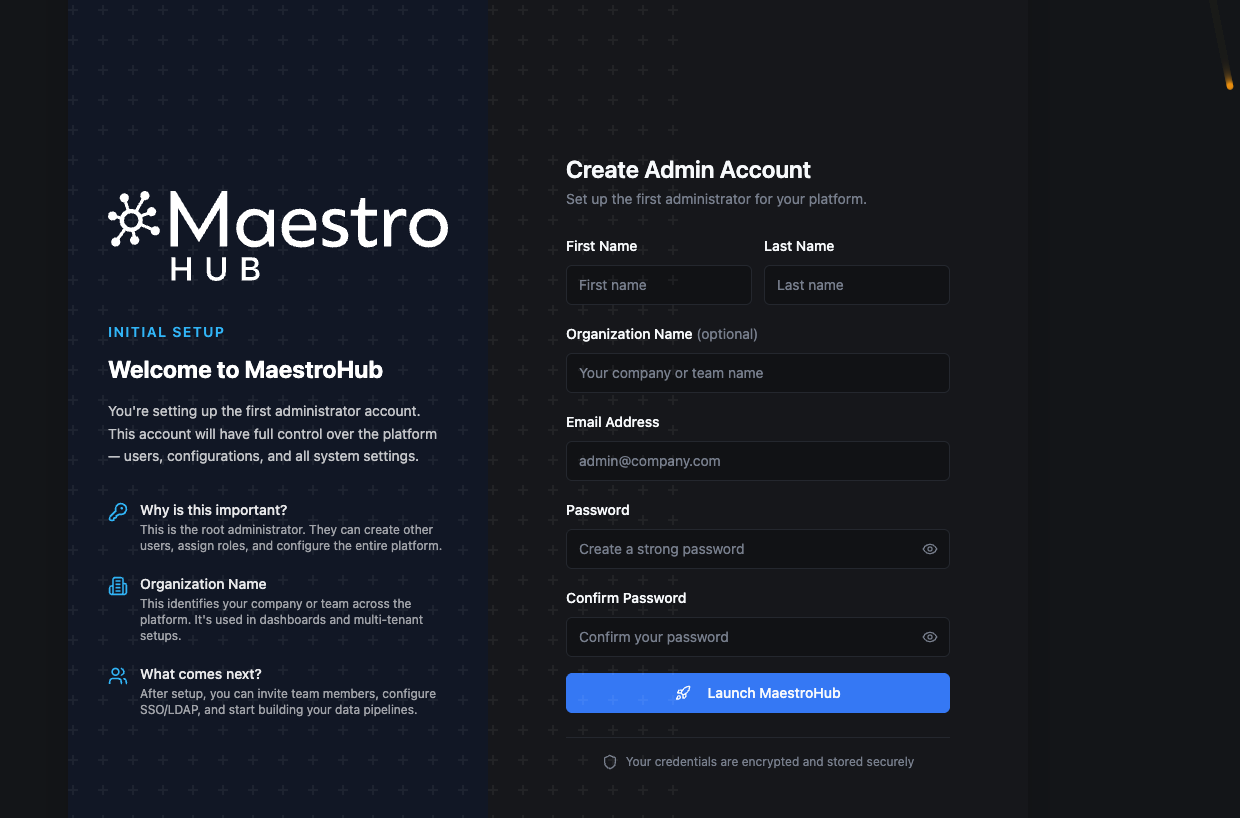
Create your initial administrator account to get started with MaestroHub.
After creating your account, you are signed in automatically and taken to the Overview page.
3. Connect Your First Data Source
Navigate to Connect in the sidebar. Click Add Connection and choose a protocol.
No real factory? Use our Digital Factory Simulator — a realistic 4-station production line with OPC UA and Modbus data. It comes with ready-to-import dashboards, connections, and pipelines — no manual setup required. Set it up in 3 minutes →
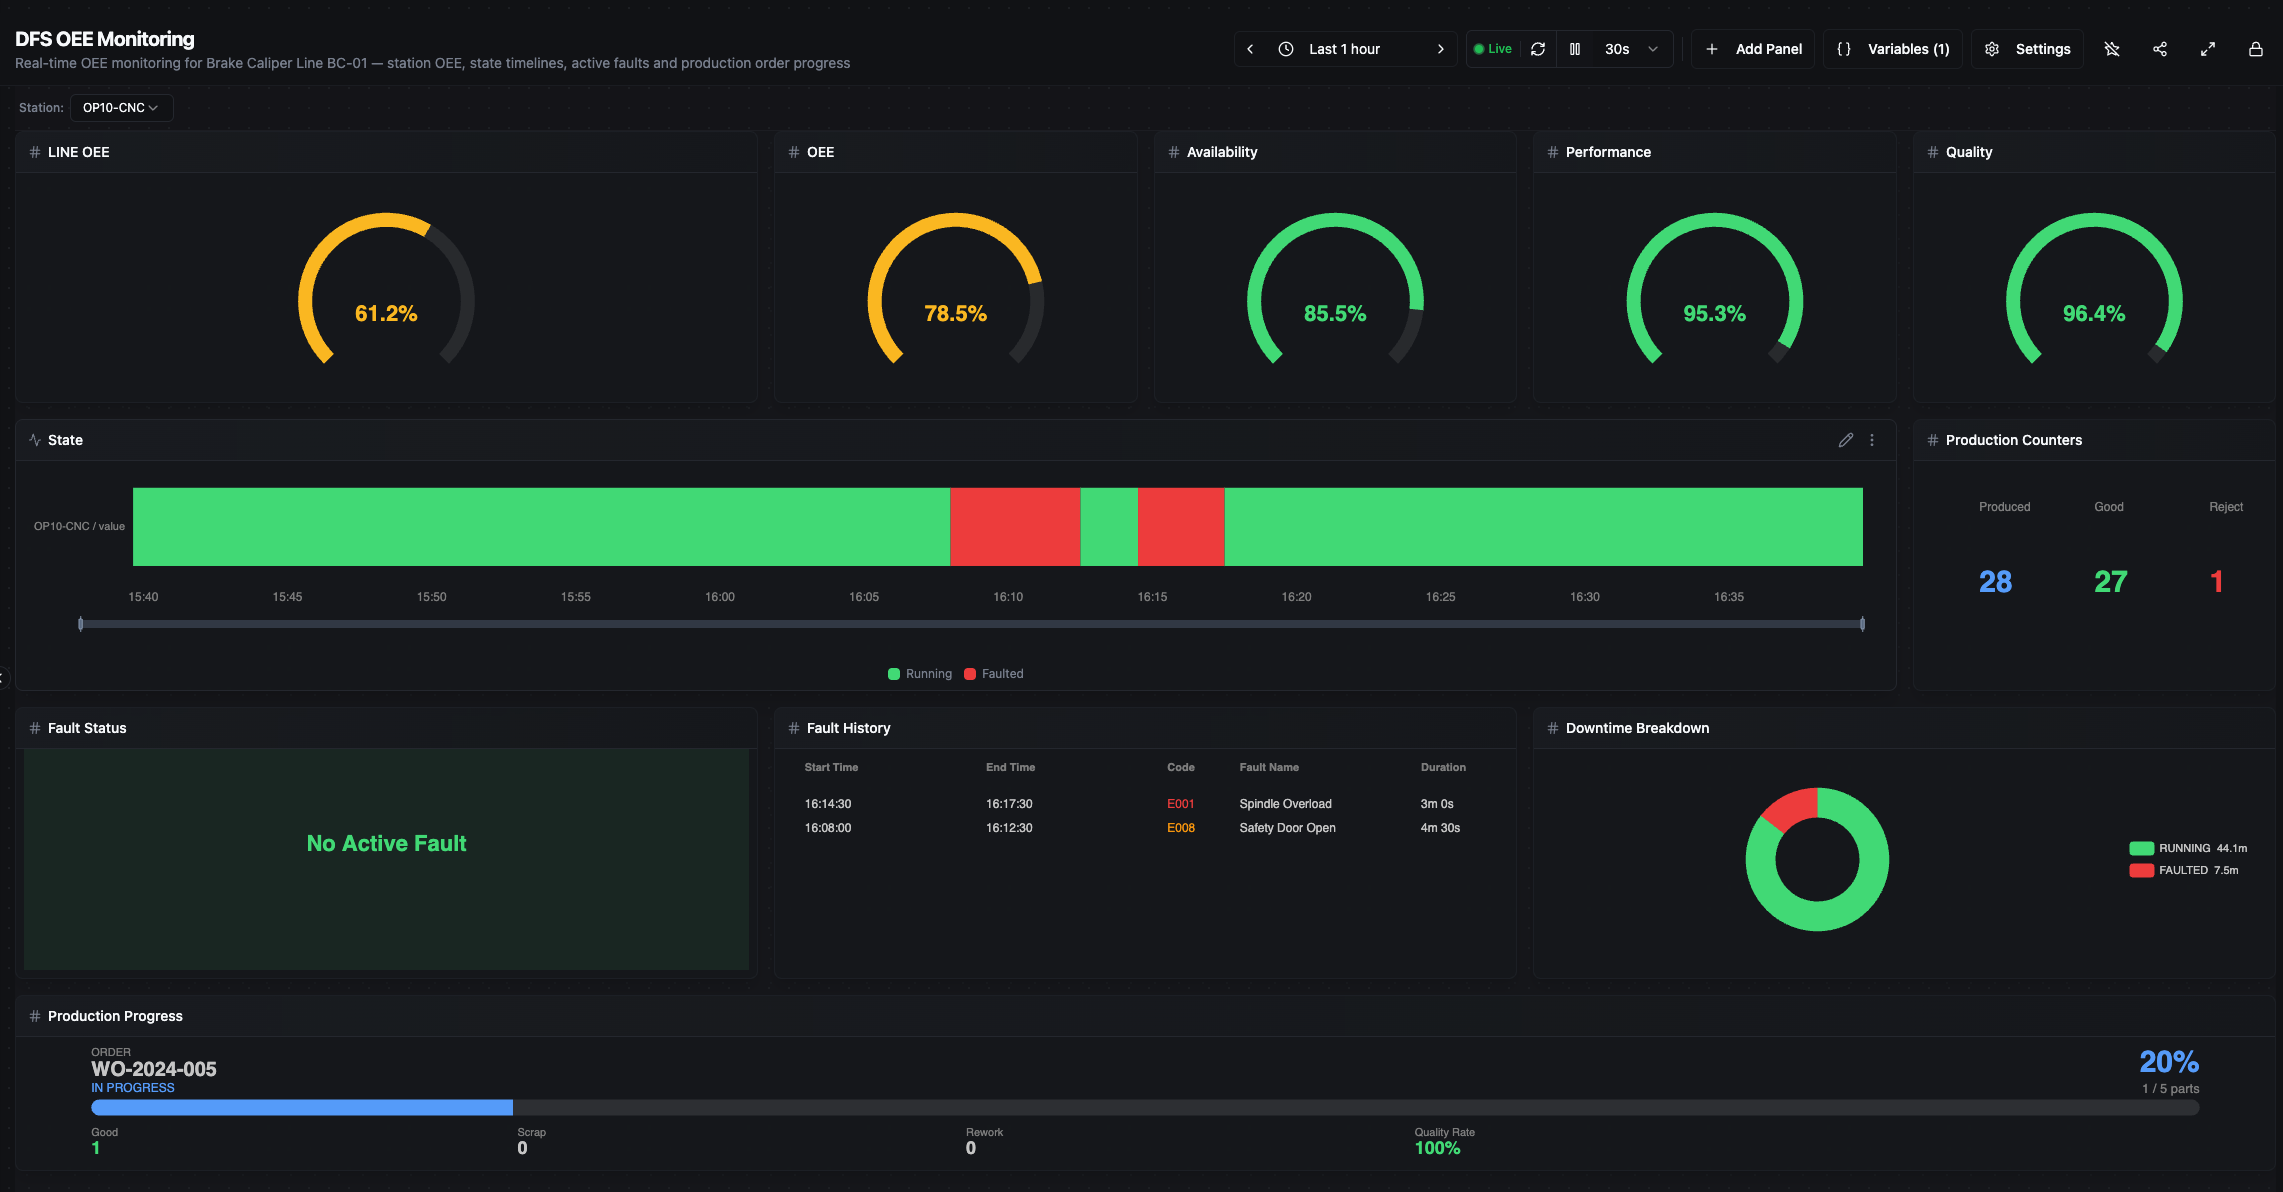
A ready-to-use OEE Monitoring Dashboard — automatically imported with the Digital Factory Simulator.
Example: OPC UA Connection
| Field | Value |
|---|---|
| Name | OP20 — Finish Machining |
| Endpoint URL | opc.tcp://localhost:4840 |
| Security | None |
Click Test Connection — green means connected. Click Save.
Or let AI do it:
MaestroHub includes an MCP Server that lets you create connections, pipelines, and dashboards using natural language with tools like Claude, Cursor, or VS Code Copilot. First, set up the integration by following the MCP Integration guide, then simply ask:
"Create an OPC UA connection called 'OP20 — Finish Machining'
pointing to opc.tcp://localhost:4840 with no security."
4. Build Your First Pipeline
Go to Orchestrate > Pipelines > Create Pipeline.
A pipeline reads data, transforms it, and publishes the result. The basic pattern:
Trigger → Read Data → Transform → Publish to UNS
- Manual — Drag & Drop
- AI-Assisted — MCP ✨
- Add a trigger — drag a Schedule Trigger, set to 5 seconds
- Add a read node — drag OPC UA Read, select your OP20 connection, pick data points
- Add a transform — drag JavaScript node, write your logic (e.g., calculate OEE)
- Add an output — drag UNS Publish, set topic to
acme/berlin/line1/op20 - Connect the nodes left to right, Save, and Enable
Set up the MCP Server connection first. See the MCP Integration guide for step-by-step instructions for Claude, Cursor, VS Code, and more.
Tell your AI assistant:
"Create a pipeline called 'OP20 Data Collection' that reads spindle speed,
temperature, and vibration from my OP20 OPC UA connection every 5 seconds,
calculates availability percentage, and publishes to the UNS topic
acme/berlin/line1/op20."
The AI creates the pipeline, configures every node, writes the transform logic, and enables it.
Manual: ~10 minutes vs MCP: ~30 seconds — same result.
Go to UNS > Data Explorer — you should see live data appearing under your topic.
5. See Your Data Live
Go to UNS > Dashboards > Create Dashboard.
Add widgets connected to your UNS topics:
- Gauge for spindle speed
- Line chart for temperature trend
- Number card for OEE percentage
- Table for recent fault events
What to explore next
Data Integration
Connect more protocols, build complex pipelines with 50+ node types, and model your data.
Learn more →Unified Namespace
Build your topic tree, define schemas, create dashboards, and enable real-time streaming.
Learn more →Digital Factory Simulator
Practice with a 4-station production line — OPC UA, Modbus, REST APIs, zero hardware.
Learn more →Reference
Configuration
Customize MaestroHub by editing config.yaml:
http:
  port: 8080
Or use environment variables with the MAESTROHUB_ prefix:
export MAESTROHUB_HTTP_PORT=8080
Restart the application after changes.
Docker lifecycle commands
# View logs
docker logs -f maestrohub        # or: docker compose logs -f

# Stop (data preserved)
docker stop maestrohub            # or: docker compose stop

# Start again
docker start maestrohub           # or: docker compose start

# Health check
curl http://localhost:8080/health

# Full reset
docker stop maestrohub && docker rm maestrohub
docker volume rm maestrohub-data
Troubleshooting
- Port in use: Check
lsof -i :6163(binary) orlsof -i :8080(Docker) - macOS security block: System Settings > Privacy & Security > Open Anyway
- Clean restart: Delete
~/maestrohub/data/(binary) or remove Docker volume - Container not starting: Check
docker logs maestrohub