Claude Desktop App
The Claude desktop app supports MCP servers via a JSON configuration file. This guide walks you through the setup.
Prerequisites
- Node.js installed on your system — the configuration uses
npxto run a remote MCP bridge, which requires Node.js. Download it from nodejs.org. - Claude desktop app installed — download from claude.ai/download.
Configuration
1. Open Settings
Click your profile icon in the bottom-left corner of the Claude desktop app and select Settings.
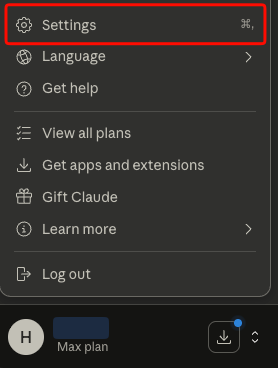
Click your profile icon and select Settings
2. Navigate to Developer settings
In the Settings panel, scroll down to the Desktop app section in the left sidebar and click Developer. Then click Edit Config — this will open the folder containing the configuration file. Open claude_desktop_config.json in a text editor.
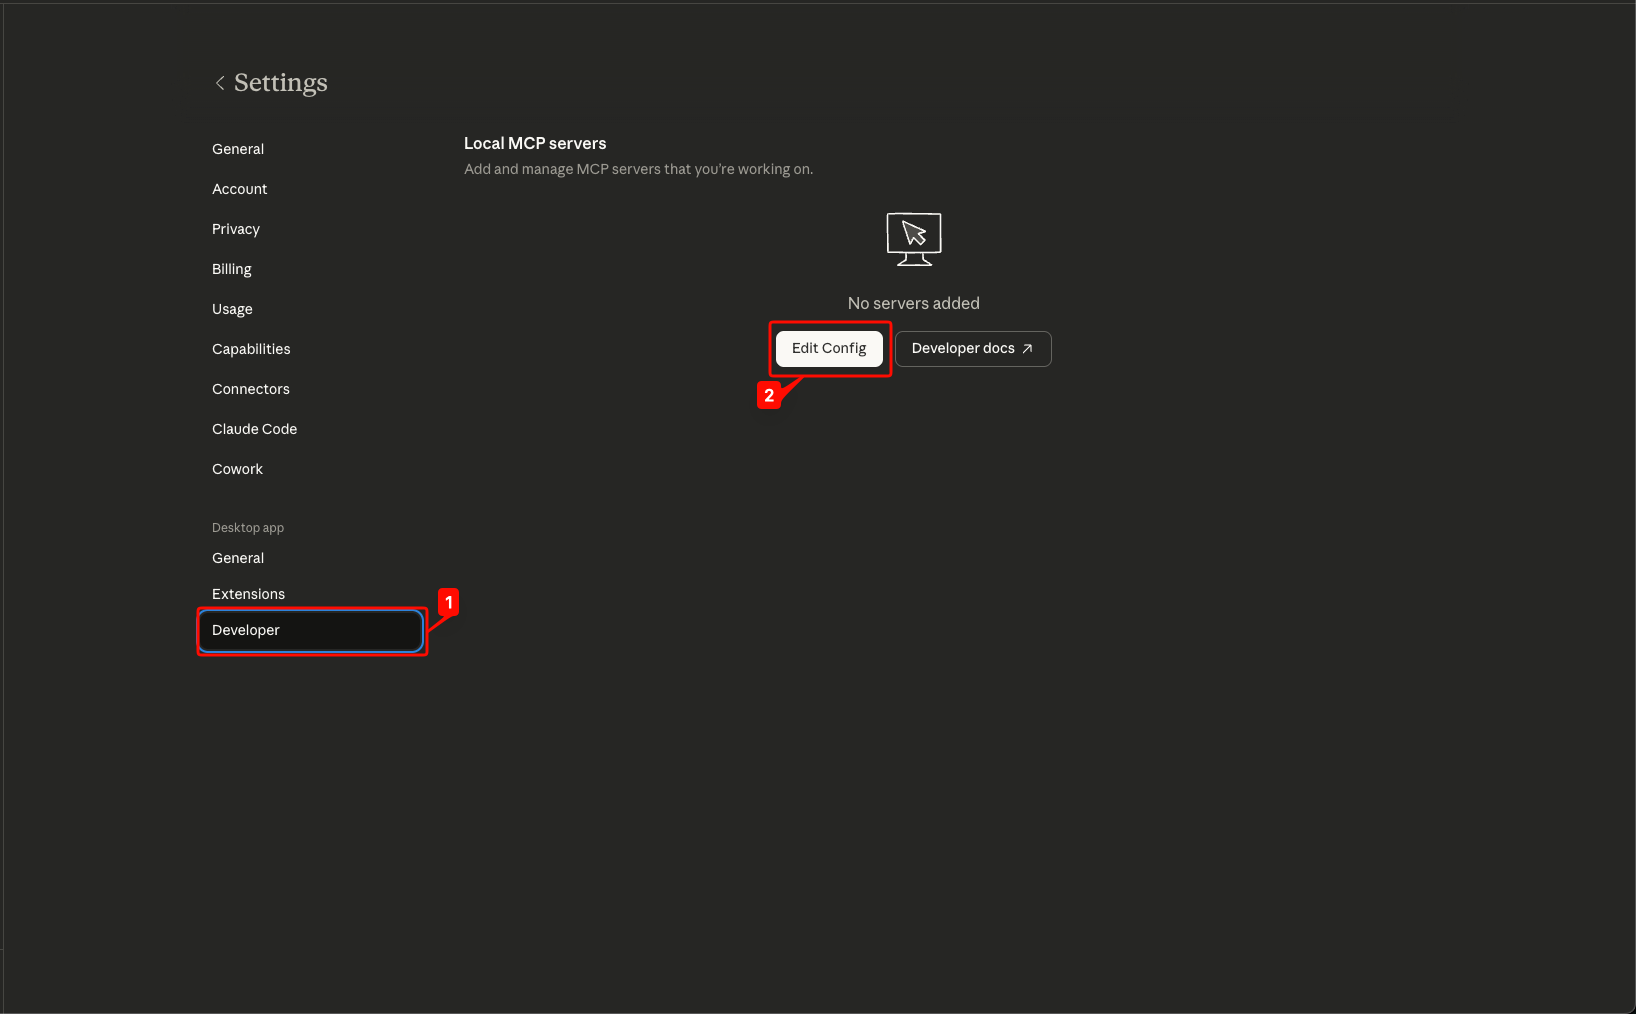
Settings → Developer → Edit Config
3. Add the MaestroHub MCP server
The file will already contain some default content like preferences. Add the mcpServers block to the existing JSON — do not replace the entire file. The result should look like this:
{
  "mcpServers": {
    "maestrohub": {
      "command": "npx",
      "args": [
        "-y",
        "mcp-remote",
        "https://<your-instance>/api/v1/mcp",
        "--header",
        "Authorization: ApiKey <your-token>",
        "--header",
        "X-Organization-ID: <your-org-id>"
      ]
    }
  },
  "preferences": {
    "coworkScheduledTasksEnabled": true,
    "ccdScheduledTasksEnabled": true,
    "coworkWebSearchEnabled": true,
    "sidebarMode": "chat"
  }
}
Replace the placeholders:
<your-instance>— your MaestroHub domain (e.g.,maestro.example.com)<your-token>— the Personal Access Token you created<your-org-id>— your organization ID (found in the URL or organization settings)
For local deployments without TLS, change https:// to http:// in the URL (e.g., http://localhost:8080/api/v1/mcp).
Keep the existing preferences block — only add the mcpServers section. Your preferences values may differ from the example above; that's fine.
4. Restart Claude
Close and reopen the Claude desktop app for the configuration to take effect.
How It Works
Unlike code editors that connect to MCP servers directly over HTTP, the Claude desktop app launches MCP servers as local processes. The mcp-remote package acts as a bridge — it runs locally via npx and proxies requests to the remote MaestroHub MCP server.
Tips
- The configuration file is located at:
- macOS:
~/Library/Application Support/Claude/claude_desktop_config.json - Windows:
%APPDATA%\Claude\claude_desktop_config.json
- macOS:
- If you see connection errors, verify that Node.js is installed by running
node --versionin your terminal. - The first launch may take a moment as
npxdownloads themcp-remotepackage. - You can add multiple MCP servers by adding more entries to the
mcpServersobject.